7. Site Settings
Site Settings allows users to make changes that will be reflected throughout the entire system by editing or creating new options/fields altogether.
7.1 Appointment Status
In this section, users are able to add an appointment status category as per convenience or requirement. To add a new appointment status, click on the 'Appointment Status' drop-down arrow as shown in the figure below:

A dialog box, as seen below, will appear. Choose the "Appointment Status" category from the dropdown and enter the desired name e.g., "By Parent" or "By Staff".
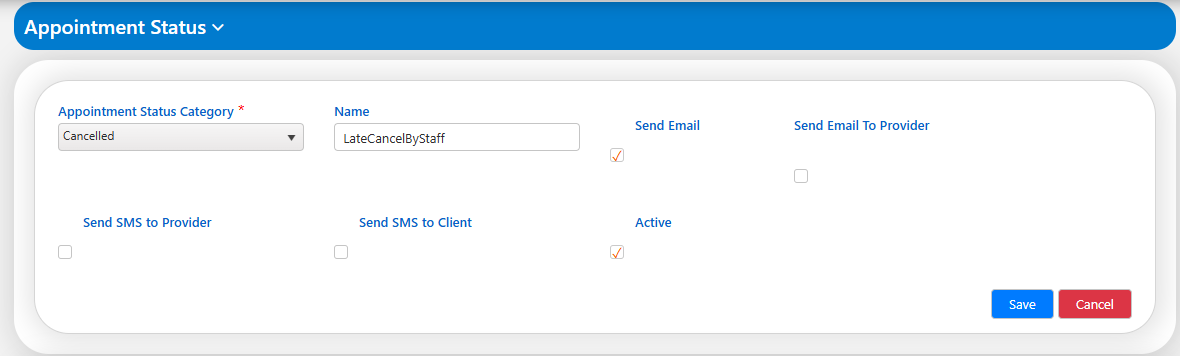
Below are the descriptions of the checkboxes:
1. Send Email - Email will be sent to all the members of the treatment team.
2. Send Email to Provider - Email will be sent to only the provider scheduled to provide the service.
3. Send SMS to Provider - The provider will receive an SMS of the appointment status.
4. Send SMS to Client - The client will receive an SMS of the appointment status.
5. Active - Determines whether or not this status is actively available to be utilized.
Users may also indicate once all necessary modifications have been made, click on "Save.’’ This will save the status under that category and the same change will be reflected in the system.

To edit any appointment status, click on the edit/pencil icon immediately to the right of the appropriate status as shown above. The relevant status information will populate in the appointment status fields at the top of the screen. Proceed to edit any necessary fields and ‘Save’ once again.
This action will be reflected under the Appointments Tab while adding a new appointment as indicated by the arrow below.
