MeasurePM has multiple program Measurement Types users can choose from when configuring their instructional programs. Each Measurement Type is associated with specific program configuration options and a unique data collection interface. Please use the guide below to understand the implications of Duration as a Measurement Type for programs.
Duration Program Configuration
Program Library
Like any other program Measurement Type, Duration programs are first set up in the Program/Goal Library. Please note that adding and editing programs in the library is permission based, meaning only authorized users will have access to do so. To change an existing program in the library to Duration, or to create a new Duration program, you can select “Duration” from the Measurement Type selection box. Depending on the Measurement Type selection made, the rest of the pop-up will provide applicable options accordingly. Take a look at all of the components of the program, specifically the success criteria. The settings for success criteria for Duration based programming allow minutes and seconds to be set.

Client Clinical Profile
When you map a Duration based program to a Client Clinical Profile, or you are changing an existing program Measurement Type to Duration, the same configurable options will be available as in the Program Library. The success criteria will be specific to Duration (i.e., criteria in minutes and seconds). Another distinction that Duration based programs have is that there is no minimum or total trial count for the program as a whole or for allocation of trials across targets. If you would like the target to be available for data collection, you will need to simply set the status to any of the following active statuses (i.e., available for data collection): Baseline, In Progress, Maintenance, Generalization, and Post-Probe.


Mobile-App
In addition to being able to configure programs on the web, users can also configure programs on the Mobile-App. To do so, the programs must be mapped to a Clinical Profile. Mapping programs can be done on both the Web and Mobile-App. Once mapped, you can proceed with changes on the client level. From the Mobile-App, no changes can be made to programs in the library.
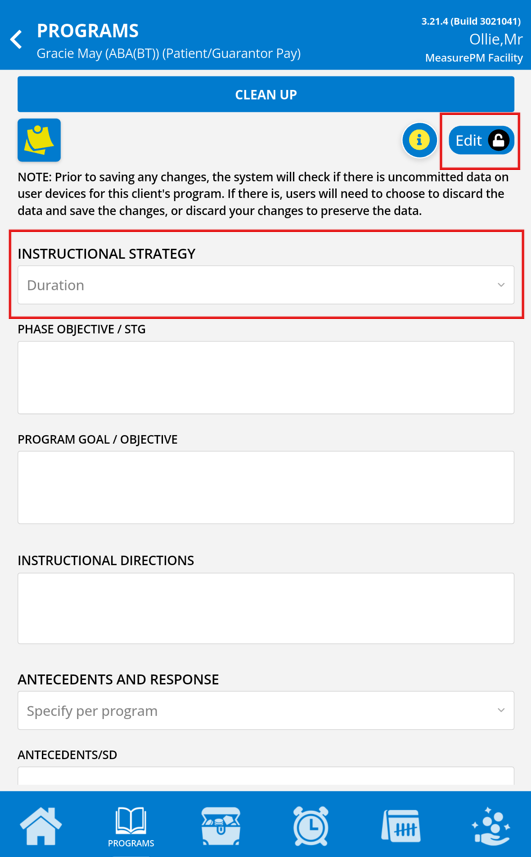
To do this, select the program you would like to edit, and from the individual program menu, select Program Info. This will open the configuration screen. Please note, editing program information on the Mobile-App is also permission based, and only authorized individuals will have permission to do so. If you have permission, select the lock icon in the top right-hand corner, and then select the specific area of the program you wish to edit.
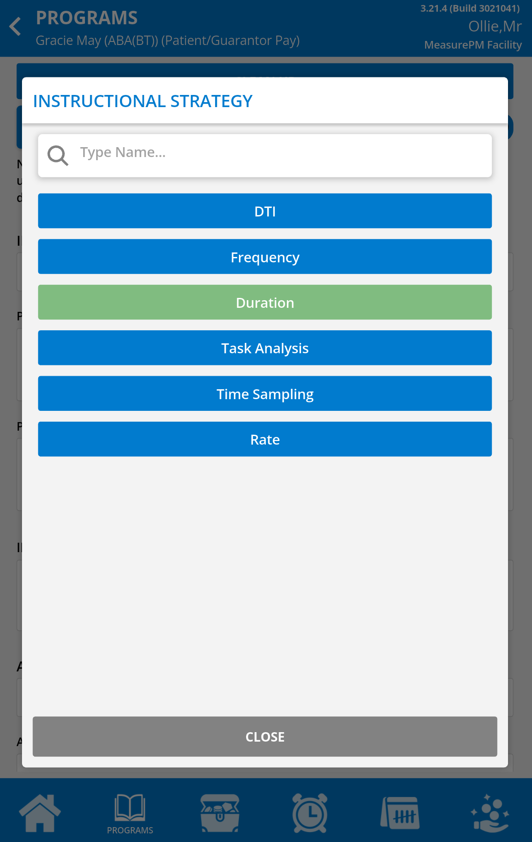
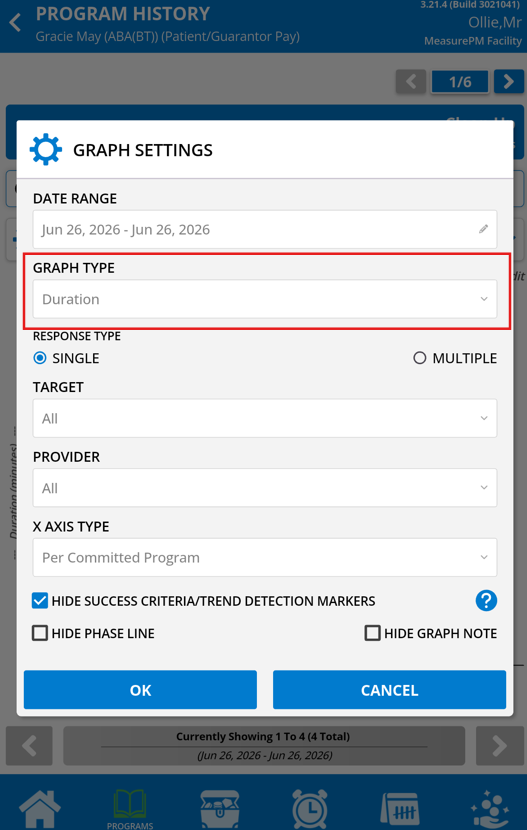
To change a program to Duration, use the Instructional Strategy drop down menu and select Duration. From there, you will see the same configurable options as you did on the web and can modify them in the same manner.
| Instructional Strategy | |
 |  |
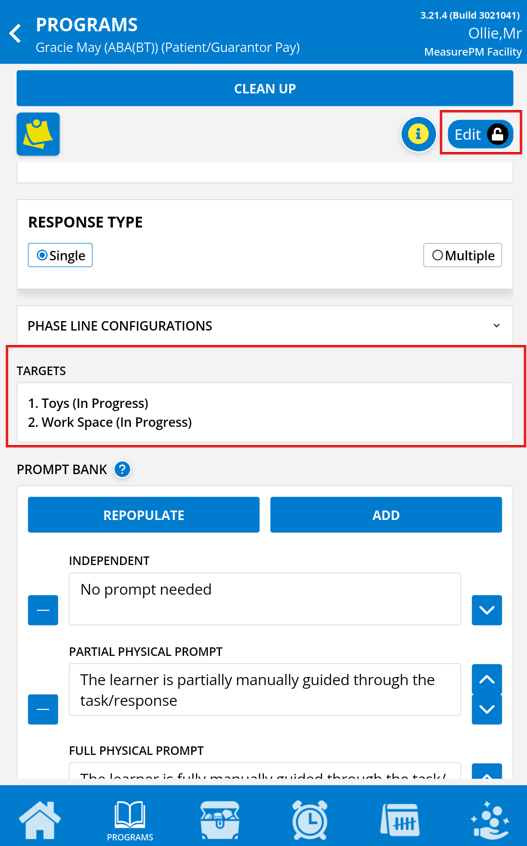
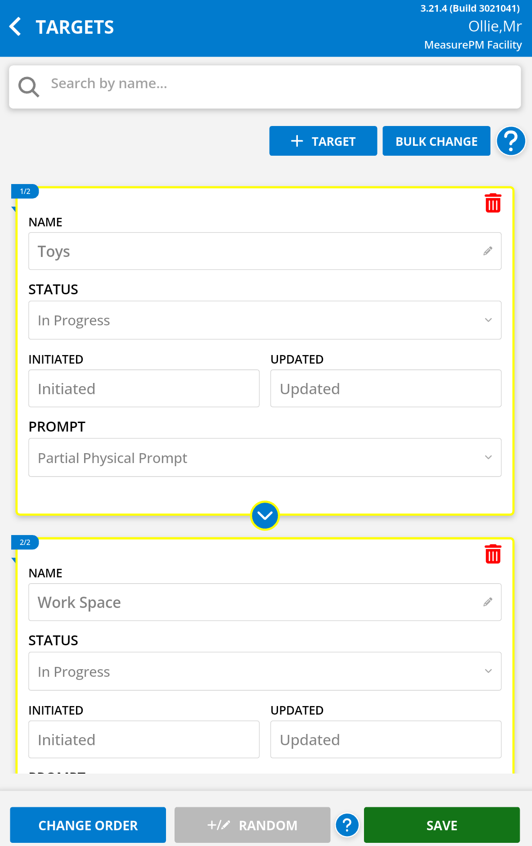
| Targets | |
 |  |
Duration on Data Collection Page
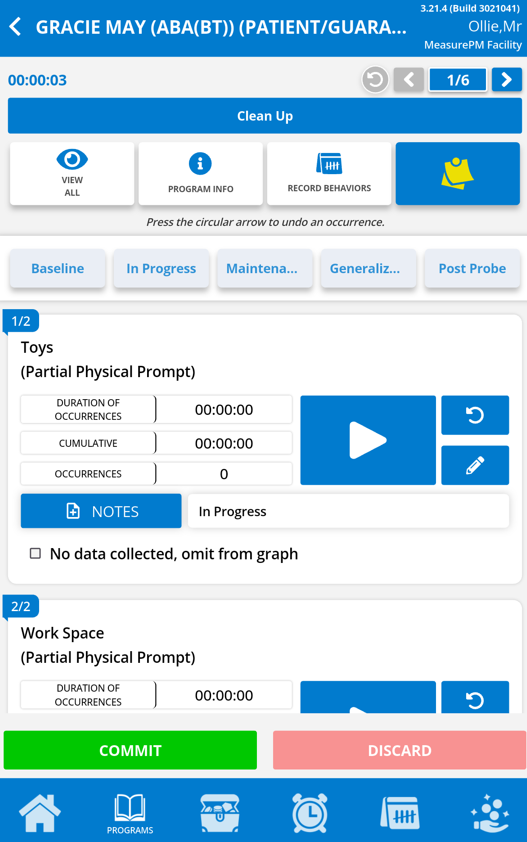
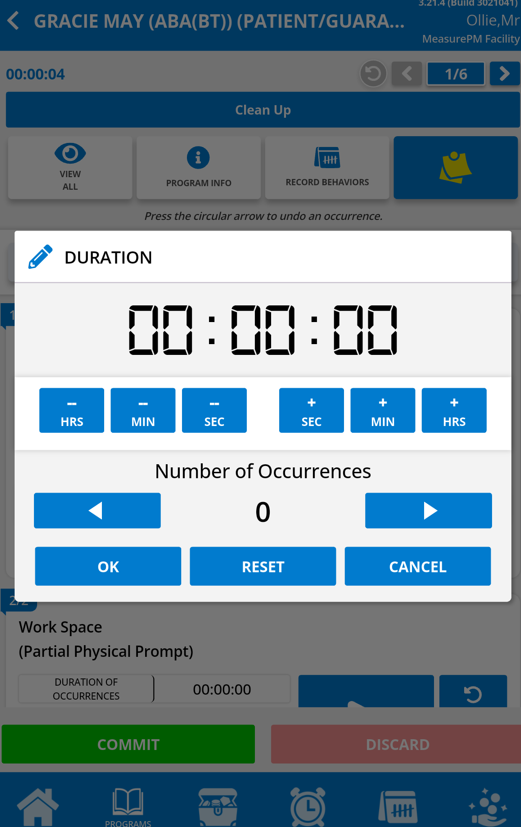
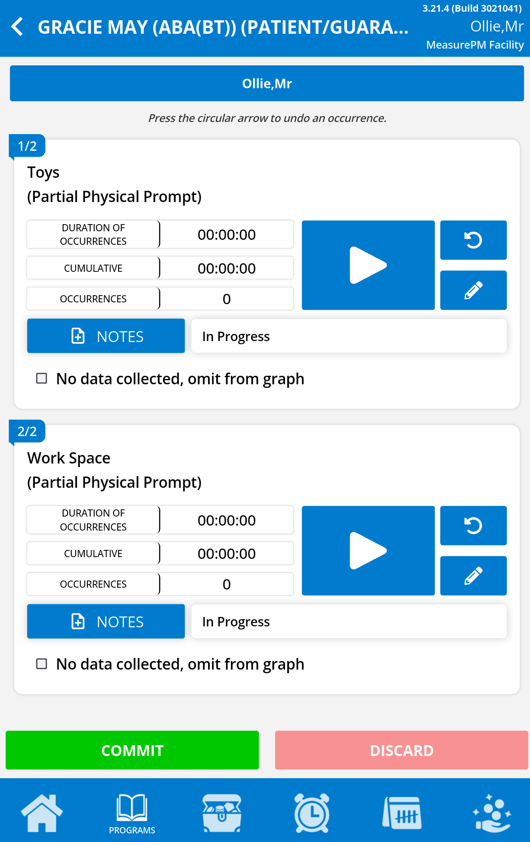
Since there is no minimum trial requirement for Duration, users can select the Commit button without recording any duration to commit a 0 duration and 0 occurrence for that program. Otherwise, you can record data using the play button beside the target(s). When the play button is selected it is replaced with a stop symbol and the timer begins to count upward. When the stop button is selected, the duration and occurrence is recorded. The cumulative duration and occurrence count for the target is shown below the play symbol. In the event that the play button was accidentally selected, the timer can be reset to 0 without the time being recorded by using the refresh icon. Finally, users can use the pencil icon to manually add duration and occurrences without using the timer seen below. When finished recording, select Commit as you do with any other program. When the program has multiple targets, they will appear as they do below. You are still able to commit at 0, without recording any duration if you would like, or you can collect data for one or all targets in the same manner as outlined above.
 |  |
Duration Success Criteria
You can configure manual success criteria on both the Web and Mobile-App, and you can configure automatic criteria across Web only.
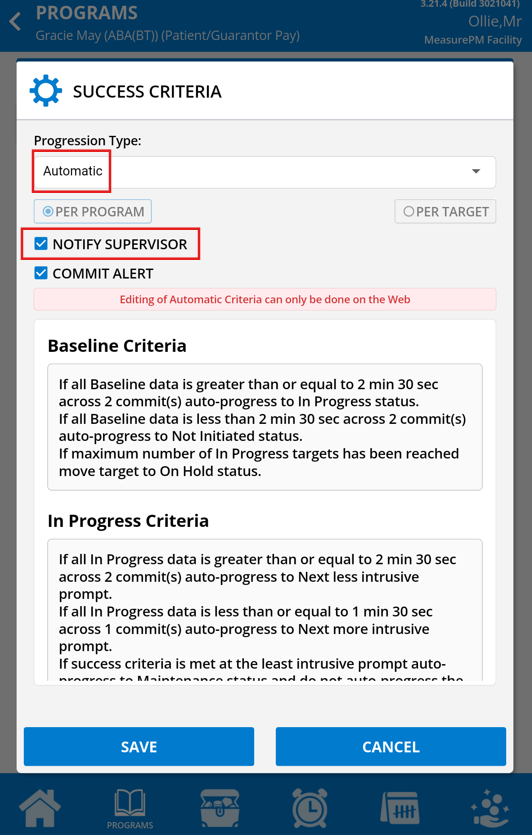
When configuring success criteria for a Duration program you will be entering what total duration of minutes/seconds are needs to achieve mastery criteria (applicable for manual and automatic progression), and/or entering total duration of minutes/seconds to trigger revisions criteria (applicable for auto progression only).
Depending on how you have your success criteria configured, any of the following might occur following success criteria detection:
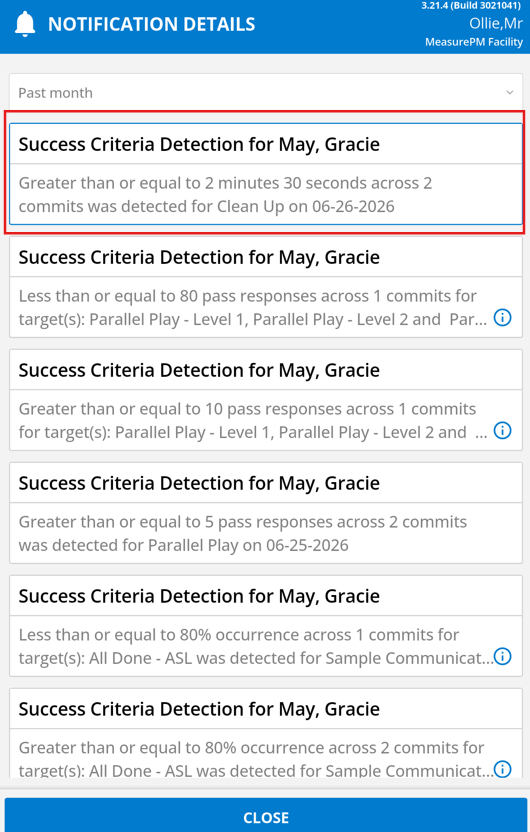
Notify Supervisor- If this option is selected, the individuals outlined as supervisors in the clinical profiles will be alerted that success criteria was detected via notifications.
Manual:
 |  |
Automatic:
 | 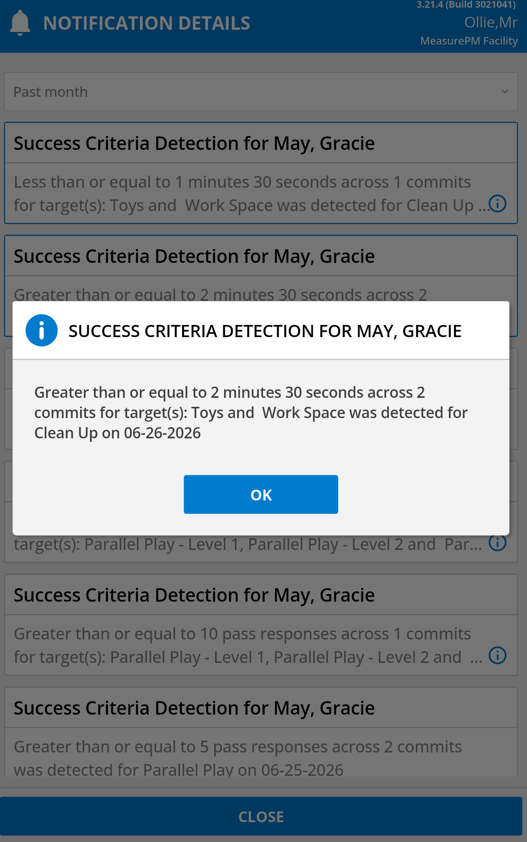 |  |
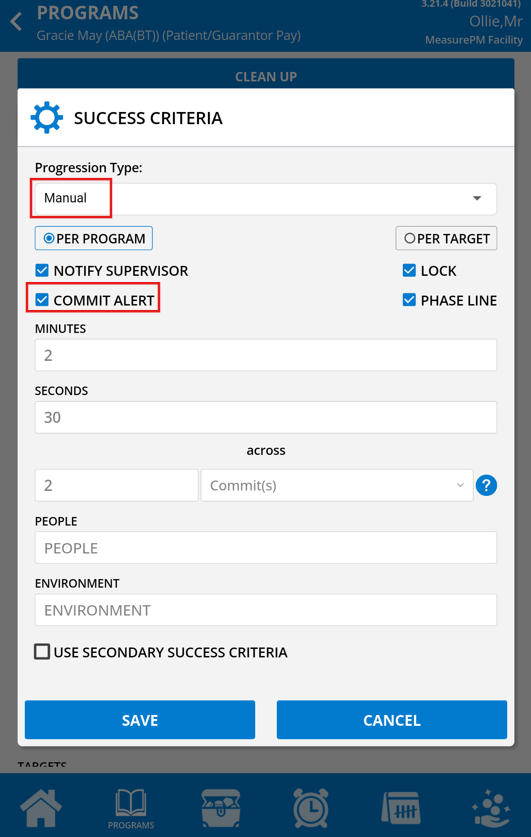
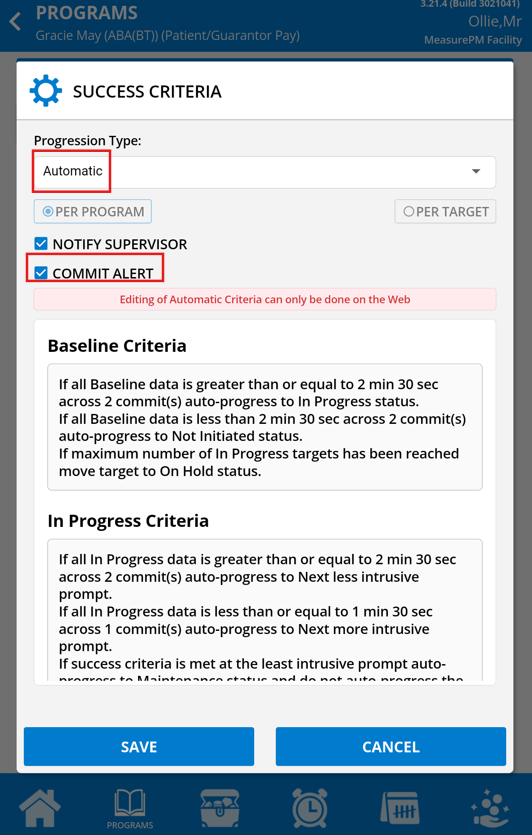
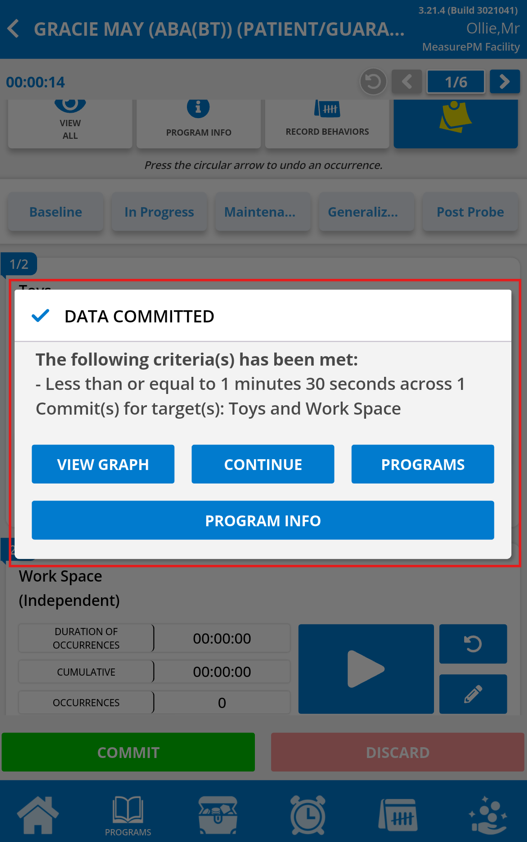
Commit Alert- If this option is selected, the user running the appointment on the Mobile-App will be notified of detection after committing the data.
Manual:
 |  |
Automatic:
 |  |  |
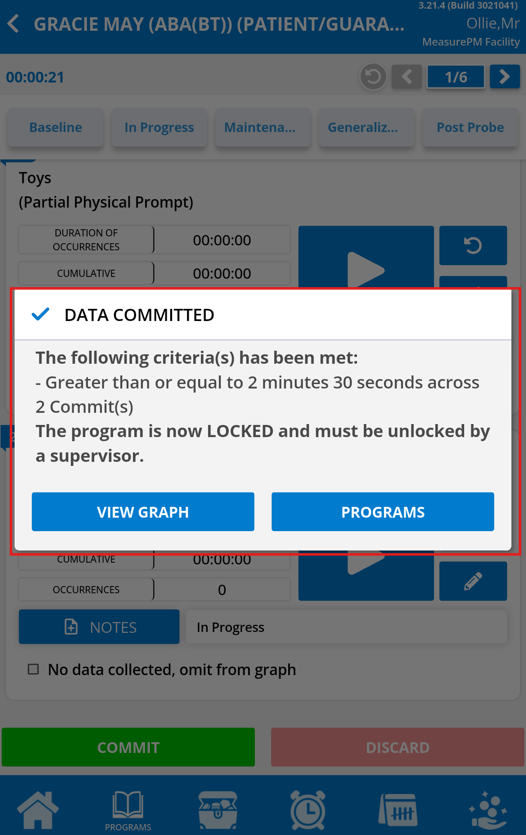
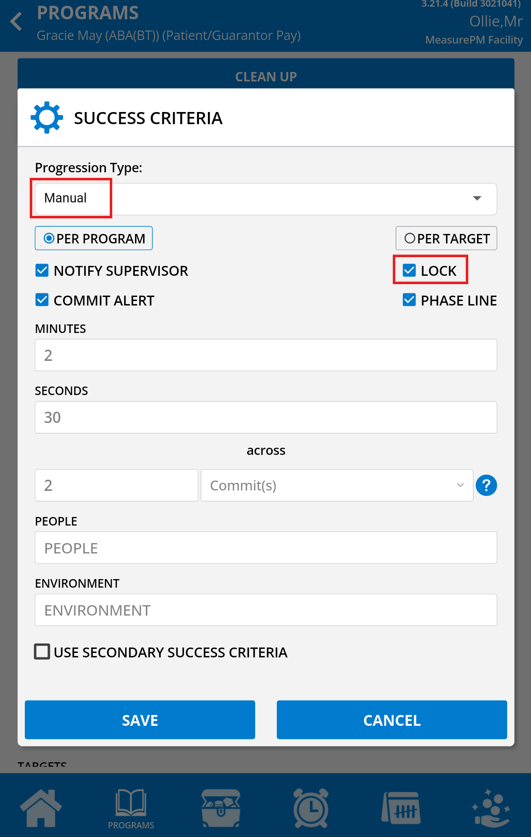
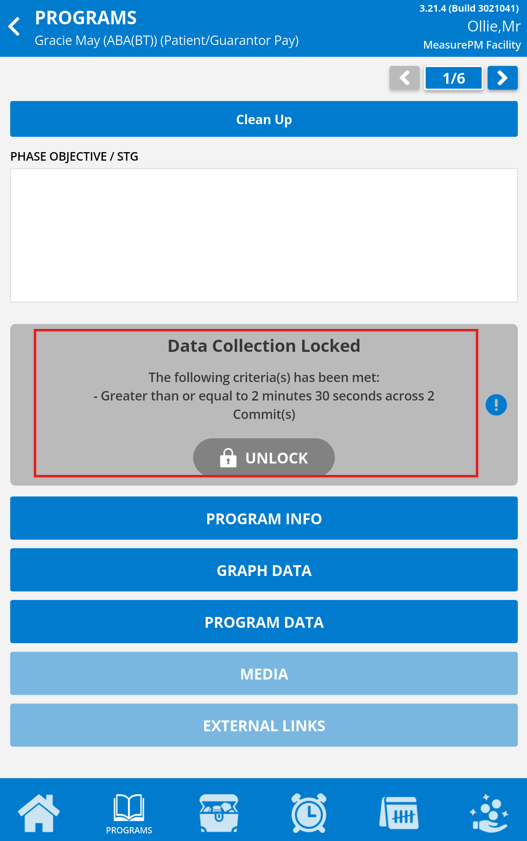
Lock- Data collection for the program will be temporarily paused and staff will be ineligible to resume data collection until a user with permission unlocks the program. This feature will only be available with Manual detection.
 |  |
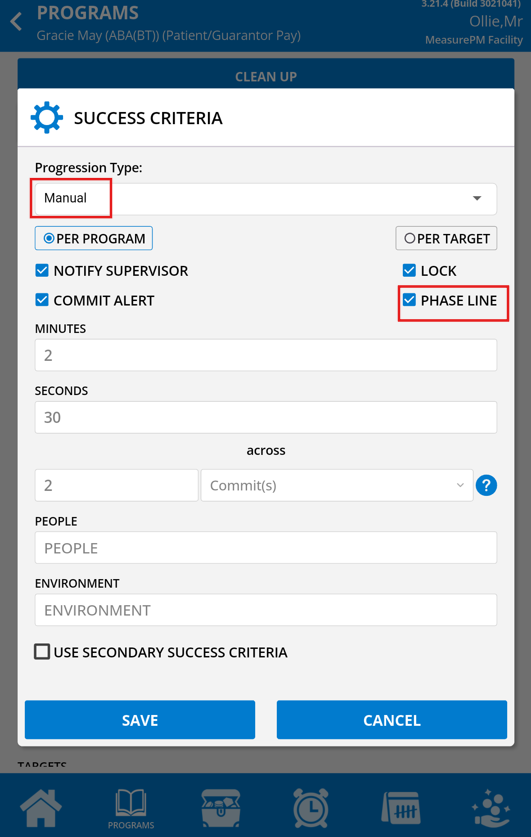
Phase line- If selected, a 'Mastered Phase' line will be added to Web and Mobile-App graphs automatically after detection. This feature will only be available with Manual detection.
 | 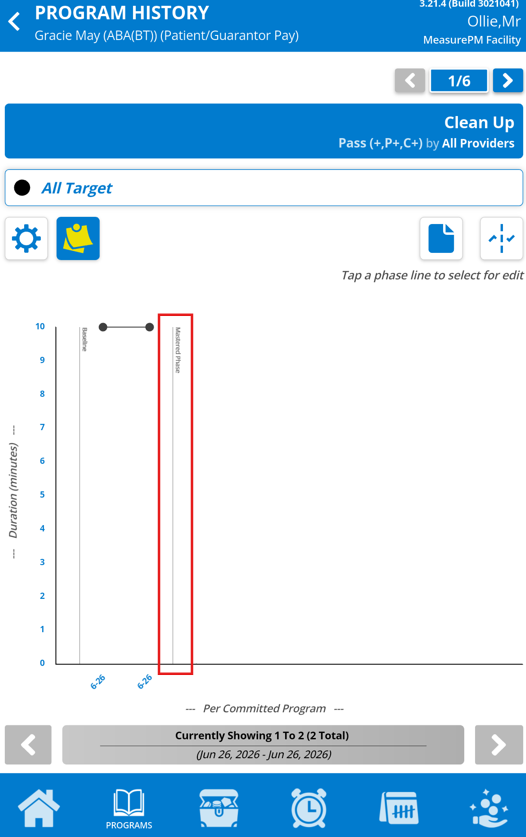 |
For additional information on success criteria, please refer to the following guides: Clinical Programming: Success Criteria and Success Criteria - Auto Progression
Committing Duration Programs at 0 Duration When Rendering
If there are any active Duration programs (i.e., programs available for data collection, which includes the following statuses: In Progress, Maintenance, Generalization and Family Guidance) in a given client’s profile with no recorded data for that appointment, you will have the option to commit those programs at 0 duration and occurrences when rendering. To do so, select the Commit Eligible Programs at 0 button, then select the programs to commit at 0 from the associated pop-up followed by OK. Once your appointment is rendered, the programs selected will be committed at 0 meaning data will be displayed as 0 duration and occurrences across raw data, SOAP notes, and graphs.
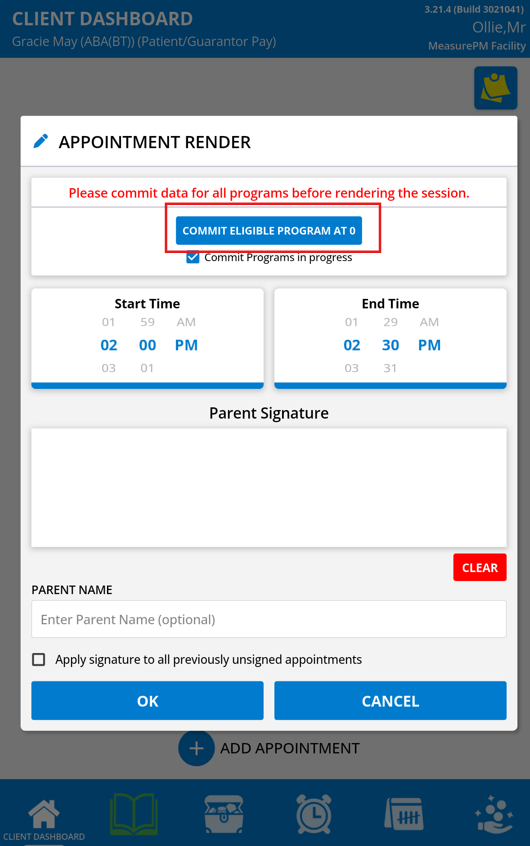 |  |
Committing In Progress Duration Programs When Rendering
If there is any data collected that has not yet been committed for duration data, the "Commit Programs in Progress" checkbox will commit that data for you. 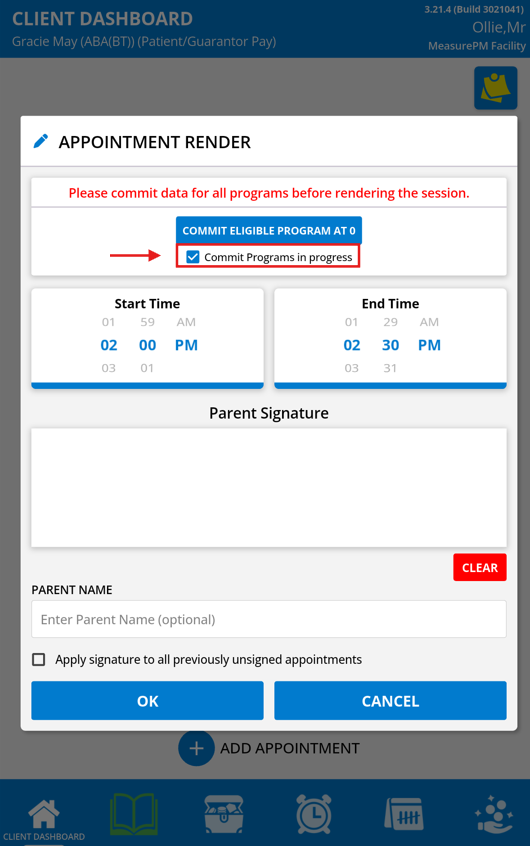
Duration Trend Tracking
Trend tracking for Duration programs is a future feature.
Duration Offline Mode
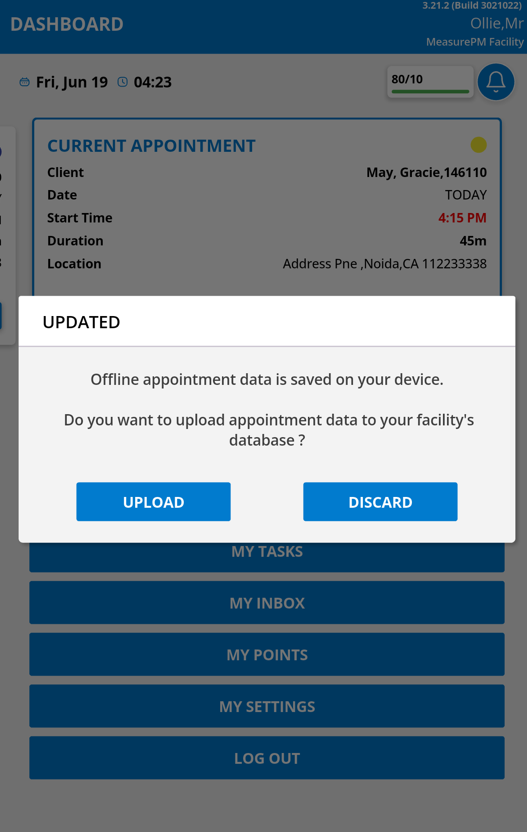
Collecting and committing Duration data is also supported in Offline mode. To ensure you will be working with the most up to date configurations for the client while offline, make sure you select the “Download for Offline” button prior to using offline mode (for example, earlier in the day). To access Offline mode, select the “Offline Mode” checkbox when logging onto the Mobile-App. You can continue collecting data as you would in online mode, however, you will not get a notification after you select commit. When you log back in online, you will be asked if you would like to upload (i.e. “sync”) the appointment information to the data base. Selecting Upload will then send all data collected in Offline to the server and be saved. If you do not upload, select discard, and the data will not be committed.
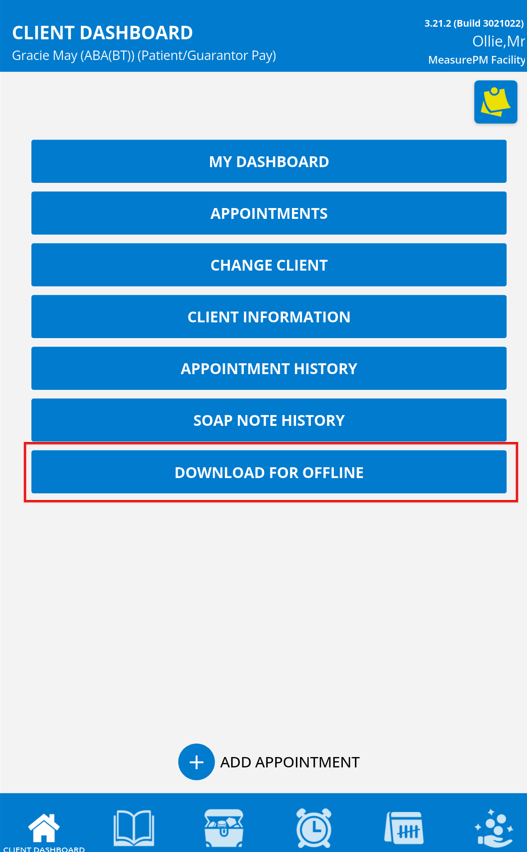 |  |  |
Duration on Graphs
Duration Graph on the Web
On the Web graphing module, Duration will only be available as a y-axis type selection if there has been Duration data committed for the program, or if it is currently configured for Duration as the Measurement Type. Duration will be the default y-axis selection if the last piece of data committed was Duration. With Duration programs, Frequency will also be available as a y-axis type selection. The Frequency count refers to the number of occurrences. As an example, if I record 4 occurrences, the Frequency will be displayed as 4. Users can choose to view graphs of these axis types independently or together as seen below. If viewing on one graph, multiple y-axes and a legend will populate.

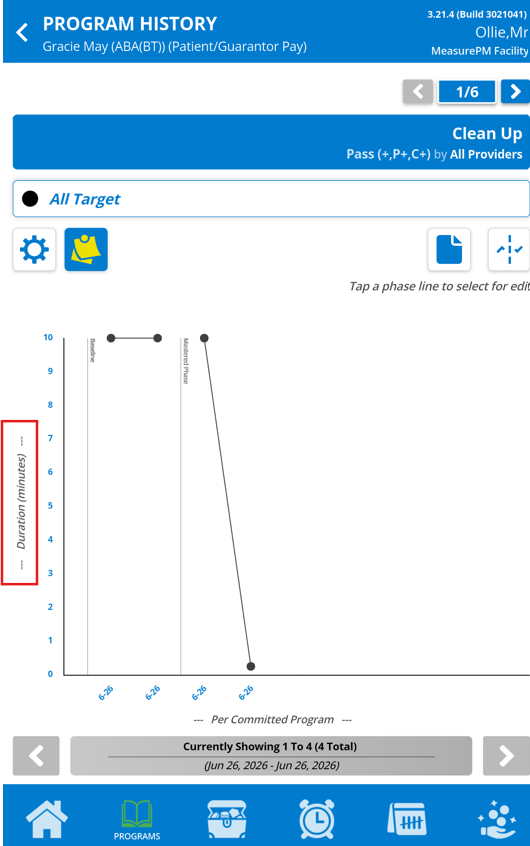
Duration Graph on Mobile-App
On the Mobile-App, graphs can be seen in the same manner, by Duration or by Frequency, however, you cannot view both on the same graph. Each can be populated independently.
 |  | 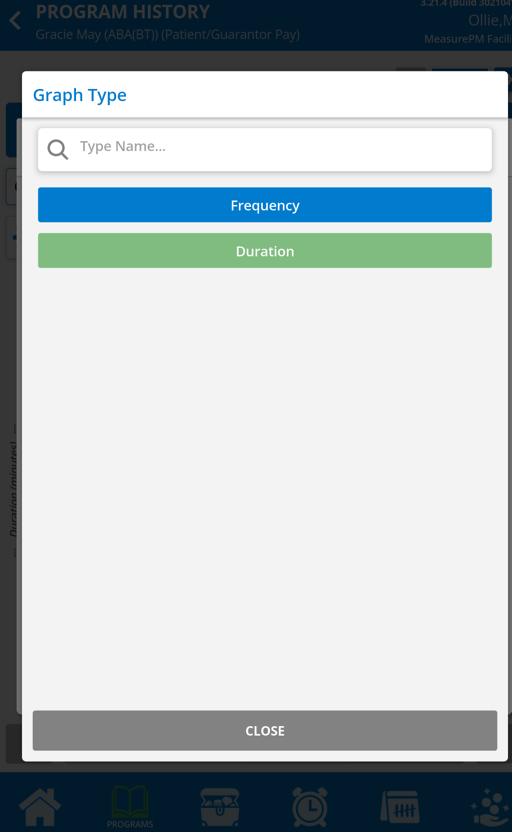 |
Duration in Soap Notes
Duration on the Soap Note on the Website
On the Web SOAP Notes, Duration data is displayed as below, under a specified column for Duration data. If no Duration data were collected a – would be present as a null placeholder as you see under the %Correct and Frequency columns.

Duration on the Soap Note Details Report
On the SOAP Notes Details Report Duration data is displayed as below, under a specified column for Duration data. If no Duration data were collected a – would be present as a null placeholder as you see under the % Correct and Frequency columns.


Duration on the Soap Note and Appointment History on the Mobile-App
On the SOAP Notes on the Mobile-App, both under Appointment History and SOAP Note History, Duration data is displayed as below, under a specified column for Duration data. If no Duration data were collected a – would be present as a null placeholder as you see under the %Correct and Frequency columns. It is similarly displayed under Appointment History as well, however, there is also an option to short-cut to the graph for the program on the Appointment History page.
| Appointment Notes | SOAP Note History | Appointment History |
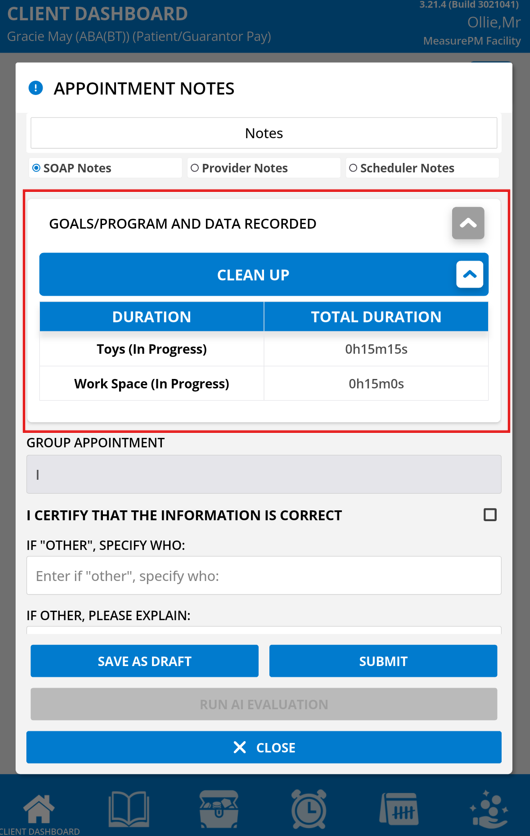 | 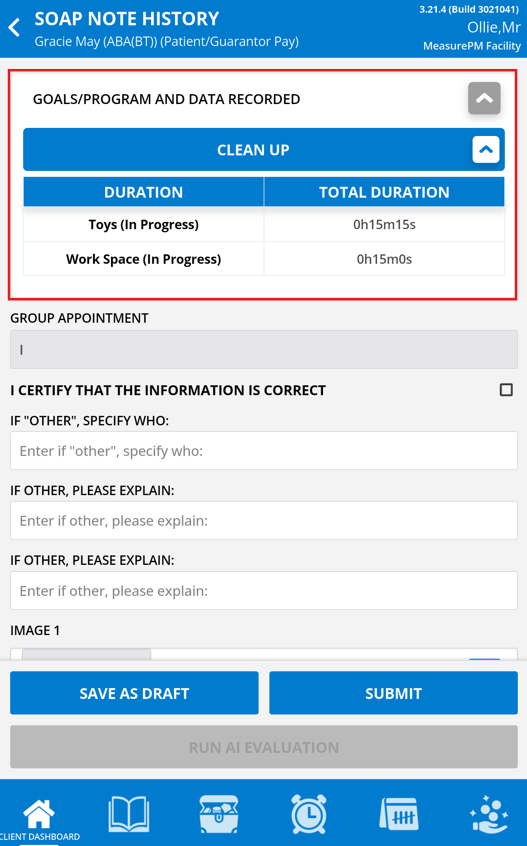 | 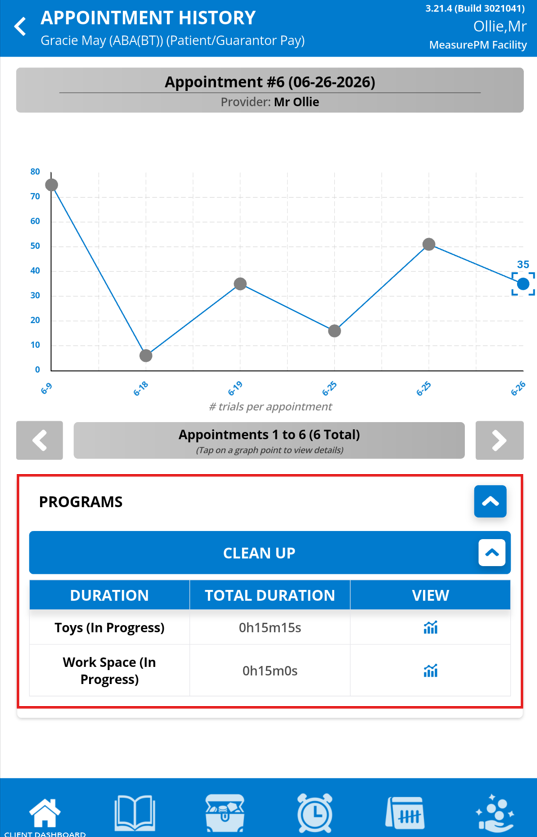 |
Reviewing Raw Data
Duration on Program Data on web
On the Web, raw data can be viewed under Reports --> Data Reports --> Clinical --> Program Summary. When viewing Duration programs, correct trials, incorrect trials, and percentage correct will have a 0-value placeholder as they are not relevant to Duration data. The columns which will hold the data are Total Trials, and will display the occurrence count, and "Dur Program Min," which will display the total duration of the program in minutes.

Duration on Appointment Summary on Web
On the Web, Appointment Summary Reports can be viewed under Reports --> Data Reports --> Clinical --> Appointment Summary. Duration program occurrence count will get added to the total trial count for the appointment and be reflected in the "Num Program Trials" column. The total cumulative duration for all duration programs for the appointment will be reflected in the "Dur Program Min" Column.

Program Data on Mobile-App
The raw data can also be viewed on the Mobile-App via Program Data and will appear as it does below. The same data will be displayed on the Web and Mobile-App, however on the Mobile-App you are also able to edit the data if you have permission to do so. To edit historical data, select the unlock icon to edit, and then proceed with making changes. To add a new set of data select Add New Program Data and proceed with adding new data from there. If you are only wanting to view the data and not edit, you can see the Total Duration at the top of the page along with Duration and Occurrence Count per target in the window below.
| Edit Previously Committed Data | ||
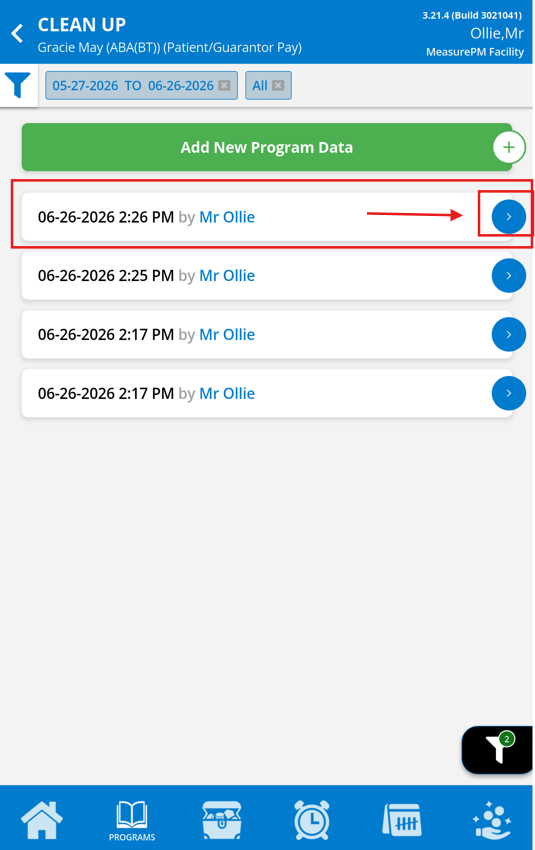 | 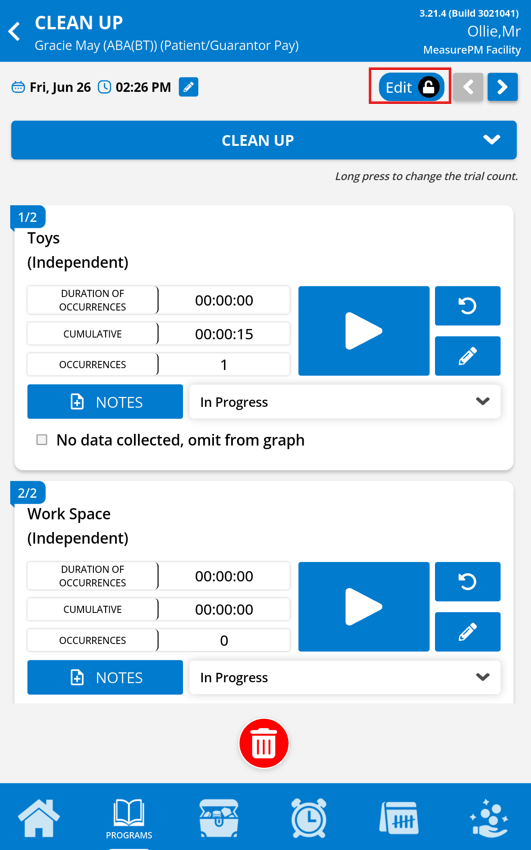 | 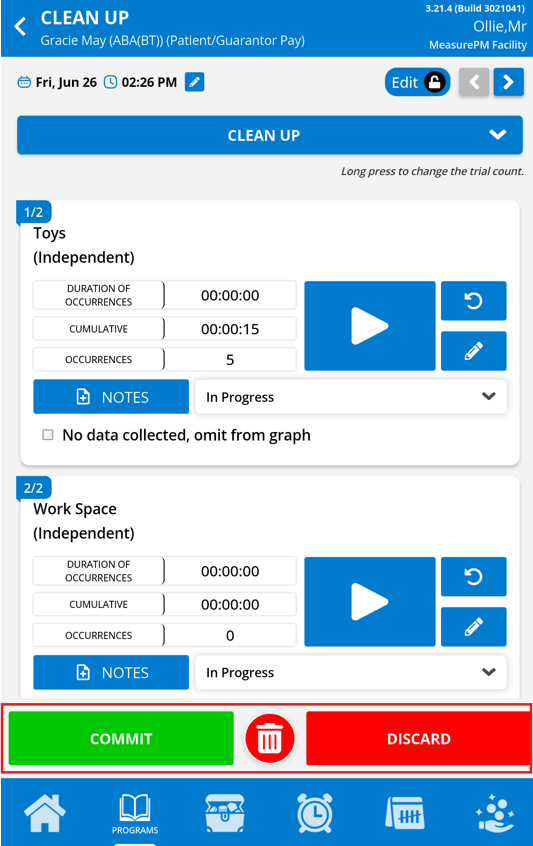 |
| Add New Program Data | ||
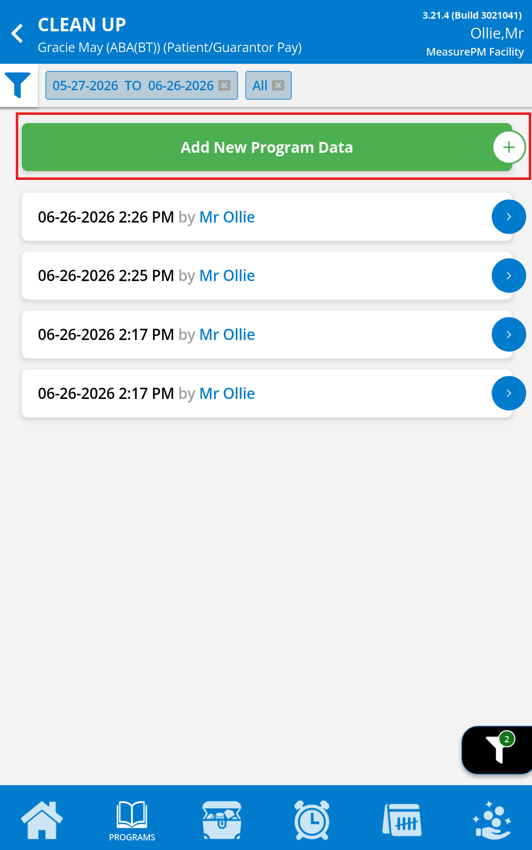 | 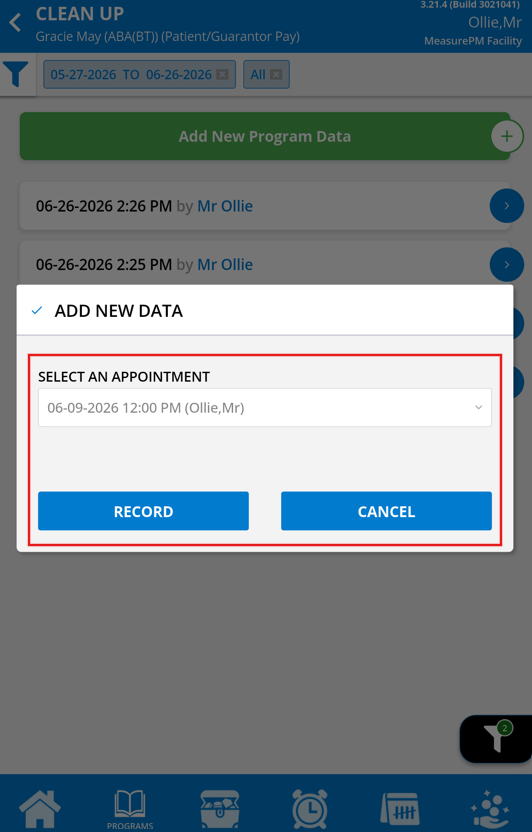 |  |
For any additional comments or questions, please reach out to support@measurepm.com.