
Overview
MeasurePM's new billing enhancement allows users to rebill claims that already have payment applied, removing the need to manually remove transactions prior to rebilling. During the rebill process, users are prompted to choose which payment transactions to remove and temporarily archived while the corrected claim is generated. Once the claim is regenerated, the transactions are automatically restored so the full payment and transactional history is maintained.
This new workflow is intended to streamline and provide more flexibility to the corrected claim process, reducing manual effort and eliminating the need to work out of multiple systems.
Corrected Claim Workflow
Step 1: Rebill The Claim from Retrieve Old Claims
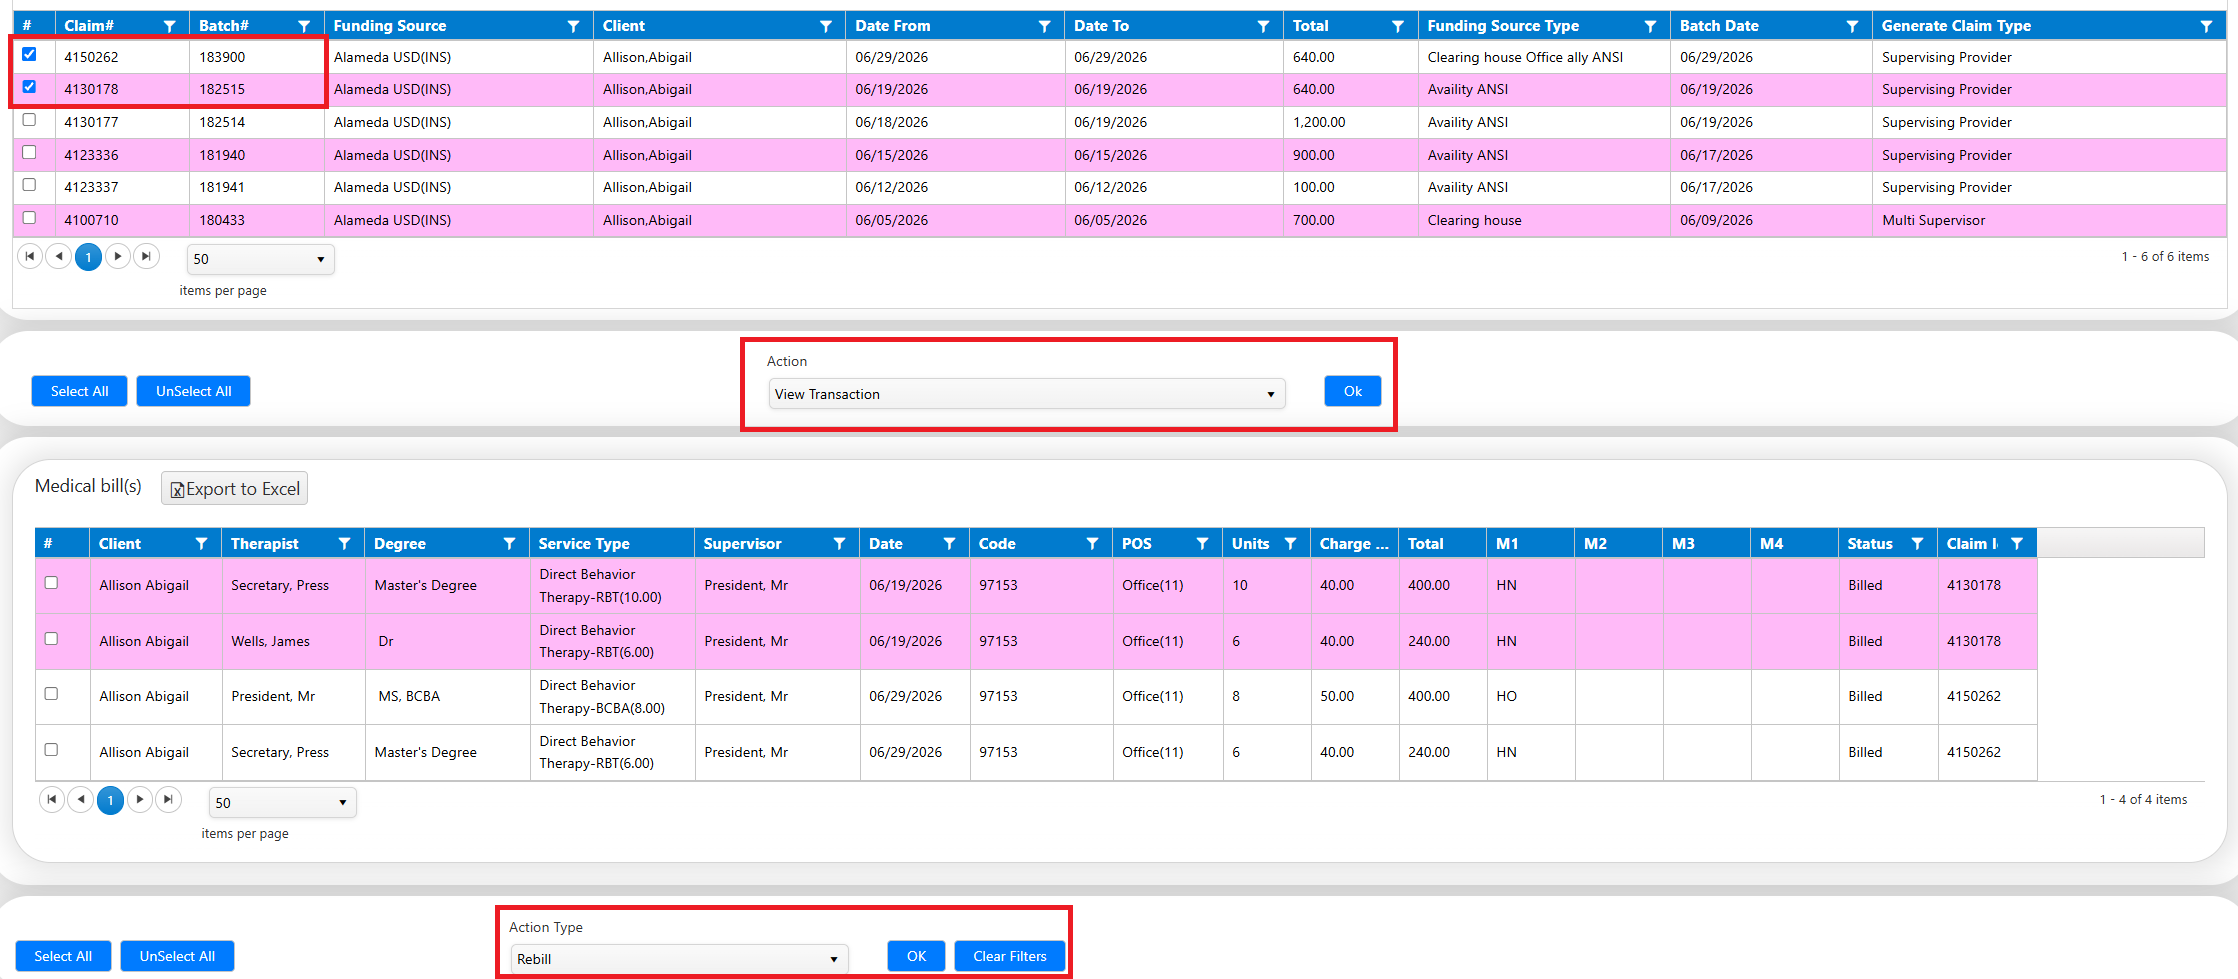
Navigate to Retrieve Old Claims and locate the claim that needs correction. Mark the claim line(s) and use the primary action menu to View Transaction.
In the secondary grid with the transaction level details, select the line(s). Click the action menu and choose Rebill.
Step 2: Review Payment Transactions
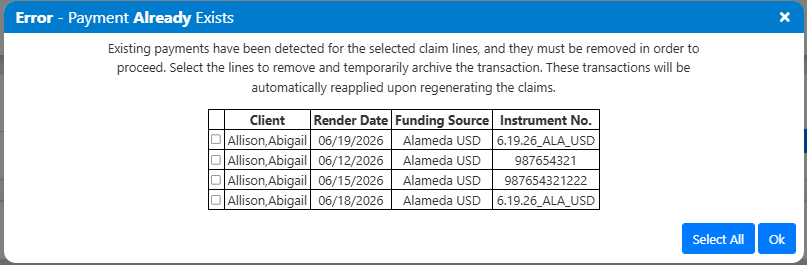
If payment transactions exist on the claim, a window displays the associated payment transactions.
Select the payment transaction(s) that should be removed from the claim before continuing.
These transactions will be archived in the background until the corrected claim is generated.
Step 3: Review the Rebilled Appointment in Stage 1
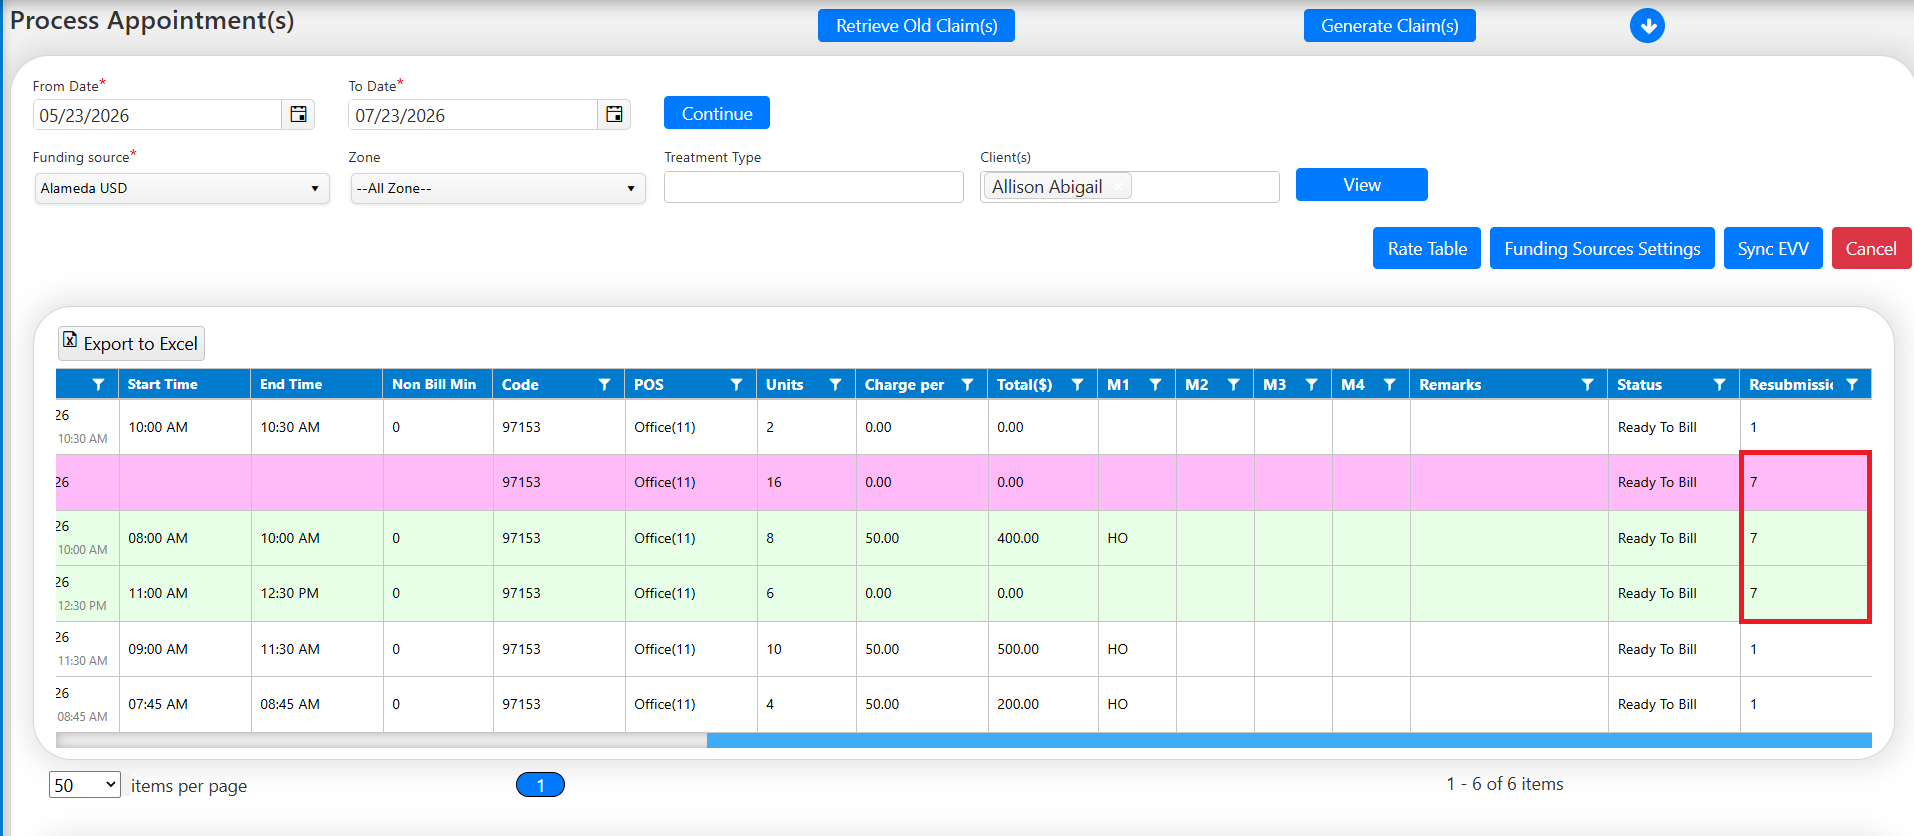
If appropriate, the user can make any necessary changes to the appointment, funding source settings, or authorization as needed for the corrected claim. If only transaction level changes (e.g., billed amount, units, modifiers, etc) are required, navigate to Process New Appointments.
The appointments that were previously rebilled will be differentiated with a pink, green, or blue background, alternating based on the original claim grouping, and will automatically populate with resubmission code 7 as shown in the last column.
Step 4: Review Corrected Claim Information
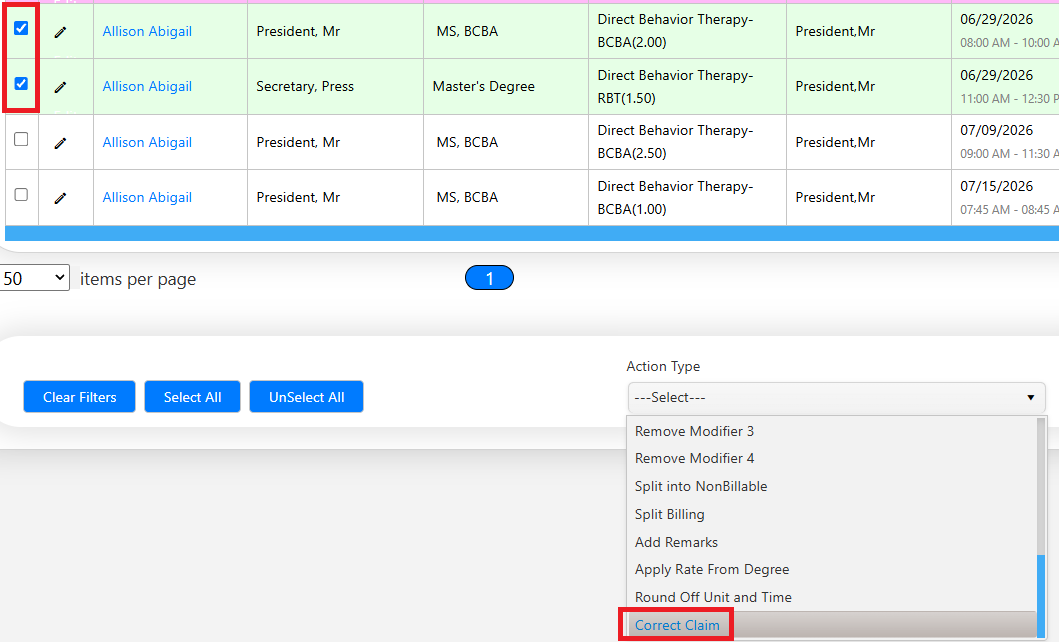
To ensure all required information is populated on the corrected claim, select the lines, one claim at a time, and use the action menu to Correct Claim.
A pop-up will appear to enter the Insurance assigned Claim Number, as well as a field for Box 19. If the Insurance Claim number is already available, it will automatically populate.

Note: If the intention is NOT to generate a corrected claim, but instead generate a claim with resubmission code 1, simply "Change Status - Revert" and repull the appointments into billing. This will reset the resubmission code. If this is done in error, the user can change the code back to 7 using the action menu with "Change Resubmission Code."

Step 5: Generate the Corrected Claim
Continue through the standard claim generation process.
All applicable corrected claim information is included in the generated claim.
Payment Transaction Restoration
After the corrected claim has been processed:
- The temporarily removed payment transactions are automatically restored.
- Payment history remains intact.
- The restored transactions are available throughout the application, including:
- Manage Deposits
- General Ledger
- Transaction History
- Applicable financial reports
Important Notes
- The corrected claim workflow is available for all funding source types.
- Rebilled appointments automatically return to Stage 1 with Resubmission Code 7.
- Insurance Claim Number is automatically populated when available.
- Box 19 is blank by default and can be updated before generating the corrected claim.
- Payment history is preserved throughout the corrected claim process.
Need Help?
If you have any questions or need assistance, please reach out to our support team at support@measurepm.com