Overview
The MeasurePM’s Trend Tracking feature allows you to configure and monitor specific data trends in your program data. Depending on your custom configurations, MeasurePM can: (i) notify the indicated Supervisor(s) via the Notifications feature, (ii) notify the user who committed the data, (iii) lock data collection for a program, and (iv) automatically plot a phase line on that program's Web and Mobile-App graphs when the system detects a specified trend. Configuring and editing trends is a permission-based feature, which means only authorized individuals from your organization will be able to modify the trend tracking settings.
Setting Up and Configuring Your Trend Tracking
Setting Up Your Site Defaults
When setting up your organization on MeasurePM there are certain default settings you can configure on the web, one of which is Default Tracked Trends. To do this, you will go to Settings under the Clinical Settings tab. Note, this is a permission-based feature, therefore only authorized individuals will be able to edit these settings.
Once you are on the settings page, you will scroll down to Default Tracked Trends section, as shown below.

Here you can add, remove and edit your trend tracking defaults. The default settings will be automatically added to each new program created in the site library. Once the program is created, the the Trend Tracking settings can be further modified as described in the following section.
Configuring Program Specific Trend Tracking
To add a trend to a new or existing program, first select the "Use Custom Tracked Trends" checkbox. Once selected, your Default Trend Tracking settings will populate for you as seen below. However, you can edit these configurations as you would like. Your customizations will override your site’s default trend tracking settings.

To customize, first select the Trend Name from the available dropdown. For further explanation of the trend, select the "?" icon to display a pop-up box describing the trend, as seen below.

Next, you will configure the Trend Threshold. The threshold value for the trend types represents the percentage of difference between the data points that is needed for the trend to be detected. Worse than (3/5), Worse than (3), and Better than (3/5) are the exception in that the threshold value represents the minimum or maximum percentage of correct or incorrect responses needed for the trend to be detected. When configuring the threshold, only whole numbers are accepted.
Next there are 4 checkbox options:
- Notify Supervisor: If this checkbox is selected, the supervisor designated in the Supervisor section of the clinical profile will receive a notification of trend detection. The notification will appear in the bell icon on the Web and Mobile-App.


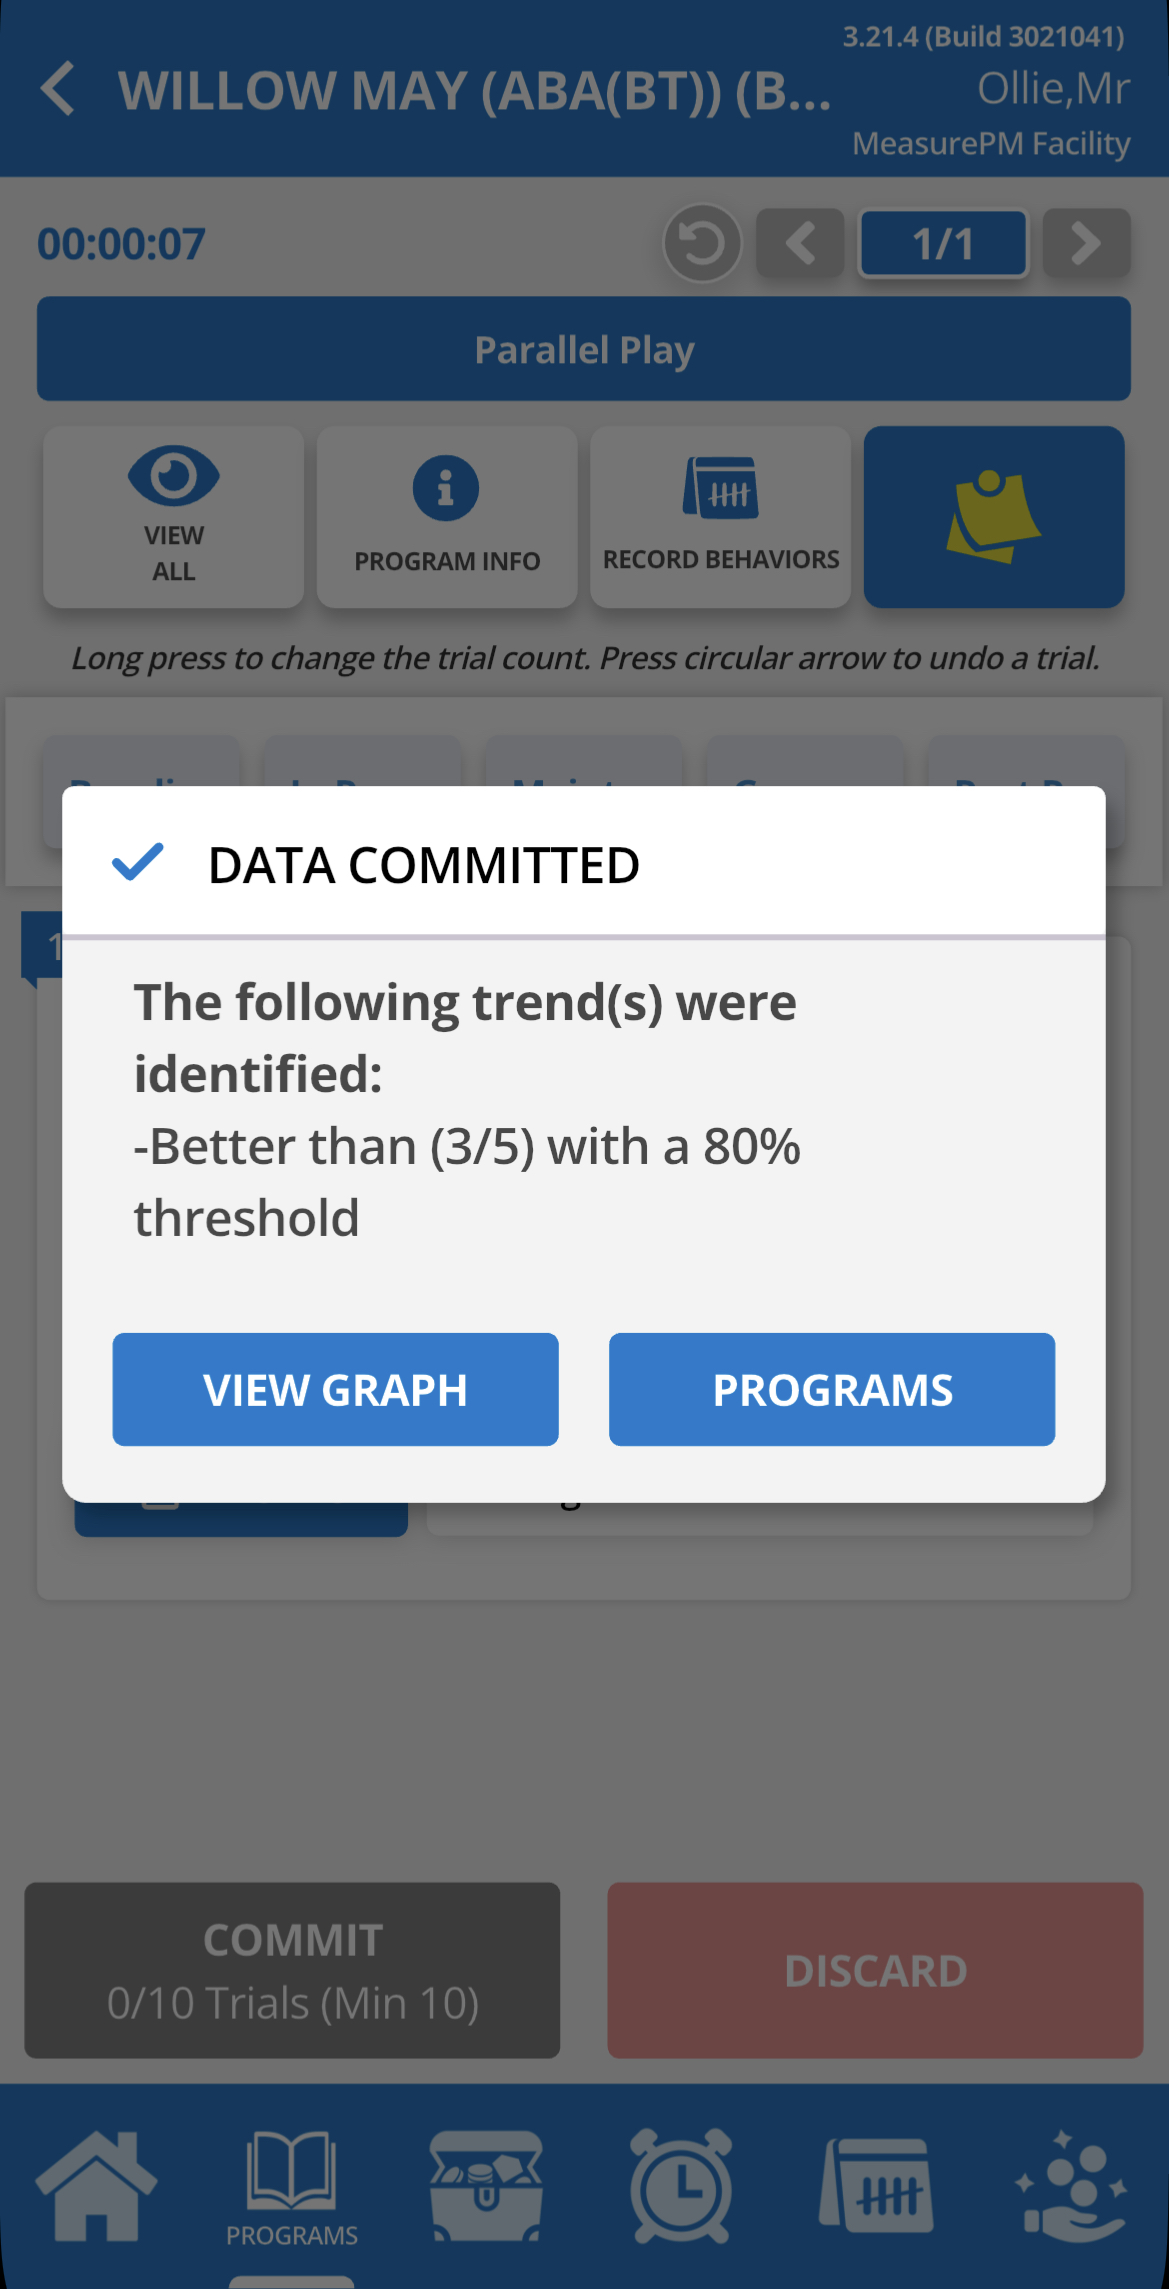
- Commit Alert: If this box is selected, the user who committed the data during the appointment will be notified via a Mobile-App pop-up when the trend is detected.

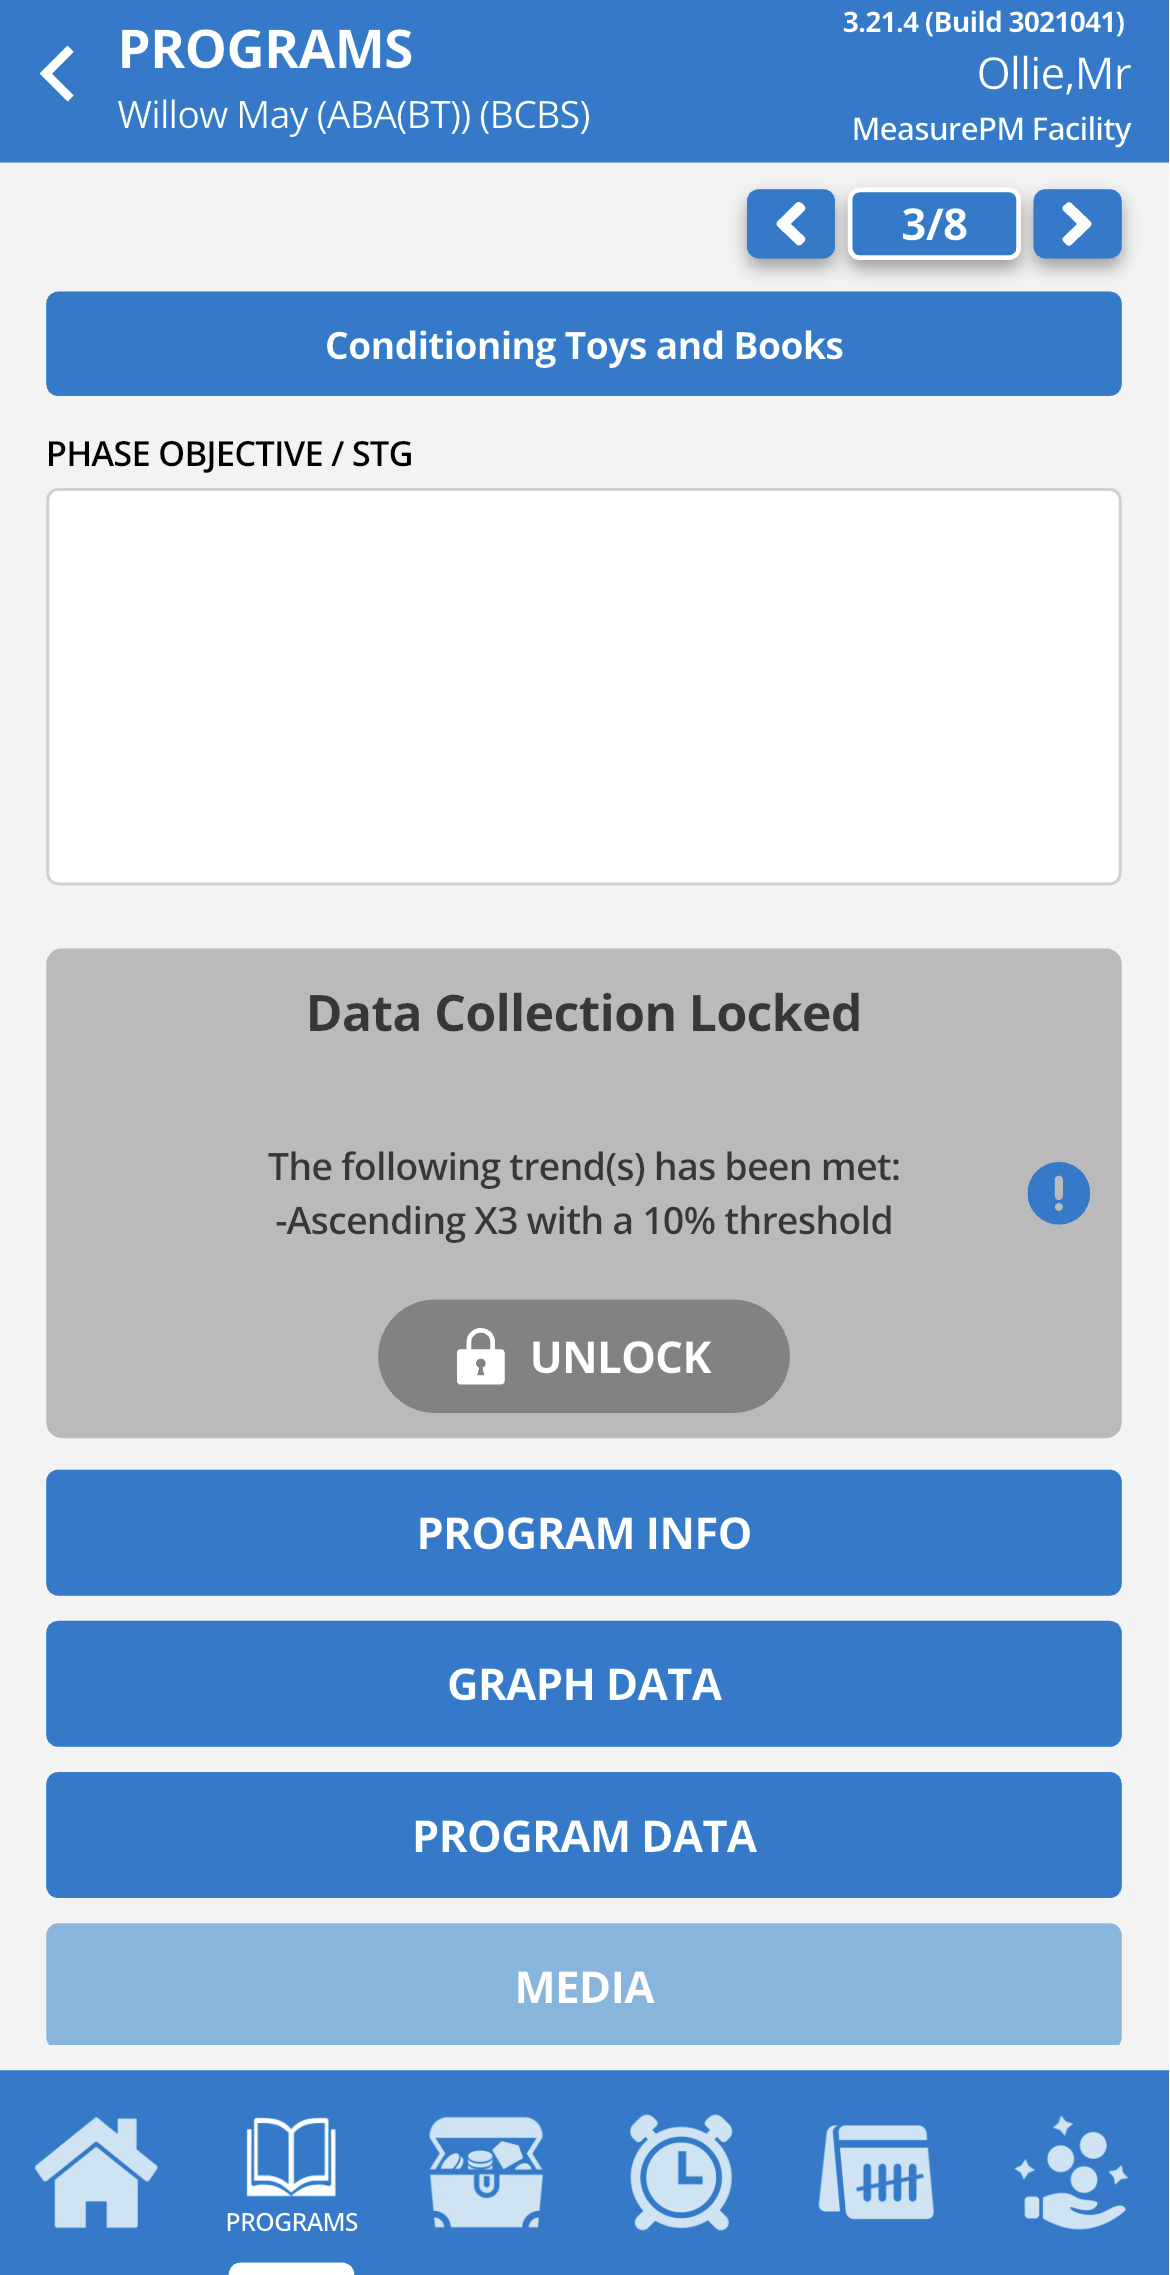
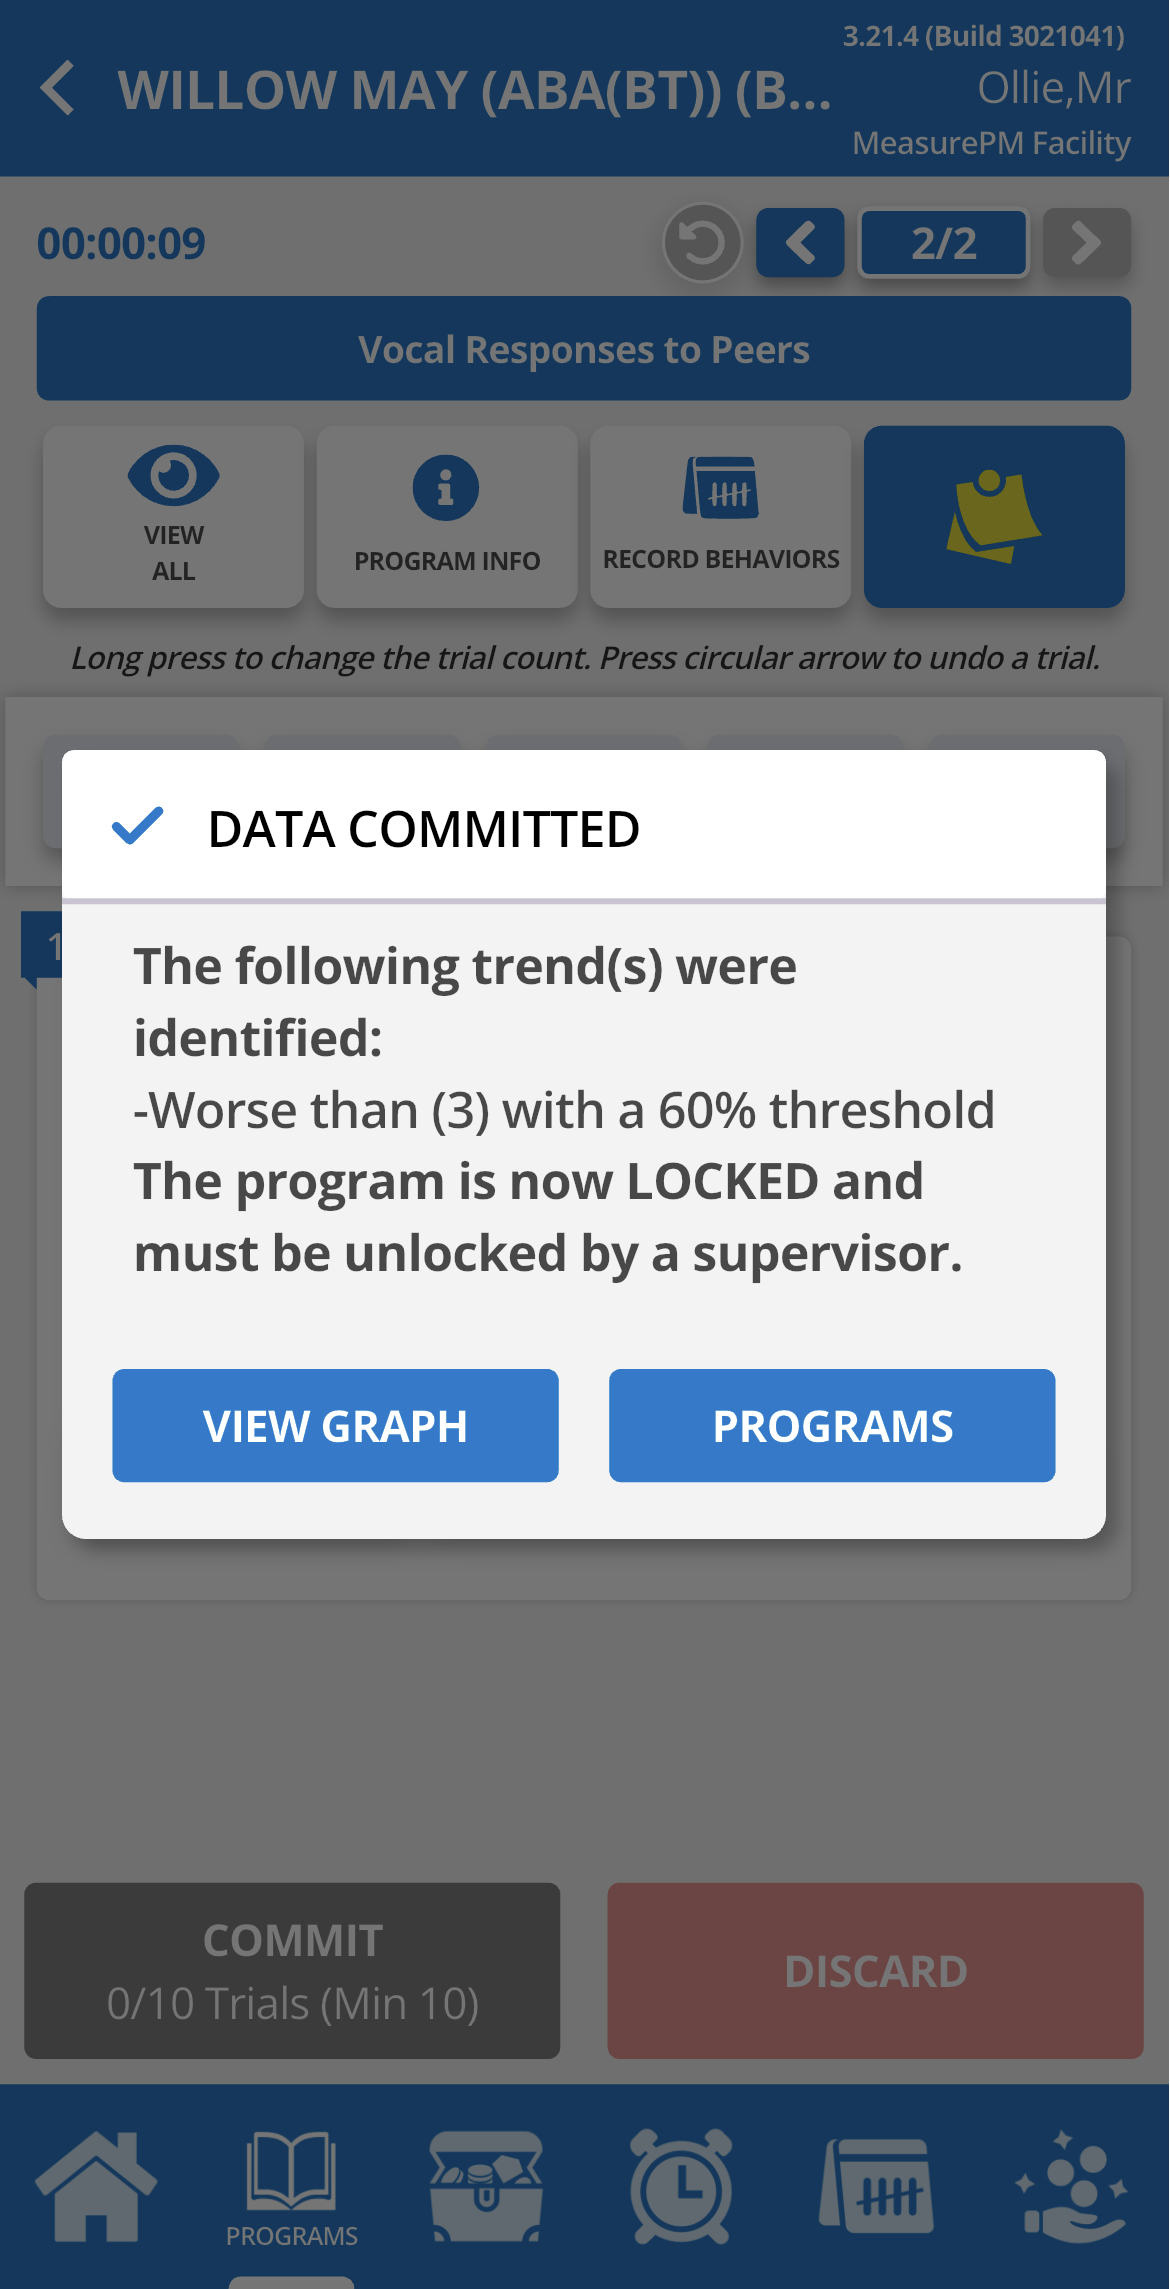
- Lock: If this box is selected, data collection for this goal will be locked and will not be available until an authorized user unlocks the program. This ensures supervisors/BCBAs are able to review and modify instruction as needed before staff are able to resume data collection.
- Phase line: If this box is selected, a phase line with the trend name and threshold value will automatically be added to Web and Mobile-App graphs after detection.

You can add up to 5 different trends for a single program. To add an additional trend, click the plus button to the righthand side. To remove a trend, click the minus button to the left of the trend.
Configuring Client Specific Trend Tracking
You can also customize trend tracking on a client-by-client basis by editing a program once it has been mapped (a.k.a. assigned/added) to a Client Clinical Profile). Once a program has been mappped to a client profile, you have the option to configure the trends of the program for that specific client. Your customizations here will override your site defaults as well as the program specific trend tracking which was set for that program at the library level.
To do this, you will:
- Select the pencil icon beside the program which you would like to edit
- Scroll down to the trend tracking section
- Click the pencil icon to edit the trend
You will be able to edit in the same manner as you would have when setting up the program. When you are satisfied with your customizations, hit the floppy disk icon to save. To remove a trend hit the trashcan icon to the right, and to add a trend, hit the plus sign below.

Types of Trends
When setting up and configuring trends, you will notice there are 8 trend options to choose from. 
Each of these 8 options is described below with an example of how they will appear on the app upon detection.
Trend Name | Description | Commit Alert Notifying User of Trend Detection | Image of Graph with Data that Triggered Trend Detection | |
Descending (x3)
| This trend is detected when a program graph reaches 3 consecutive data paths that are each a lower value than the one before it. The percentage designated in the “threshold column” indicates a percent of decrease that should be considered “descending” from the previous data point for the trend to be triggered.
| 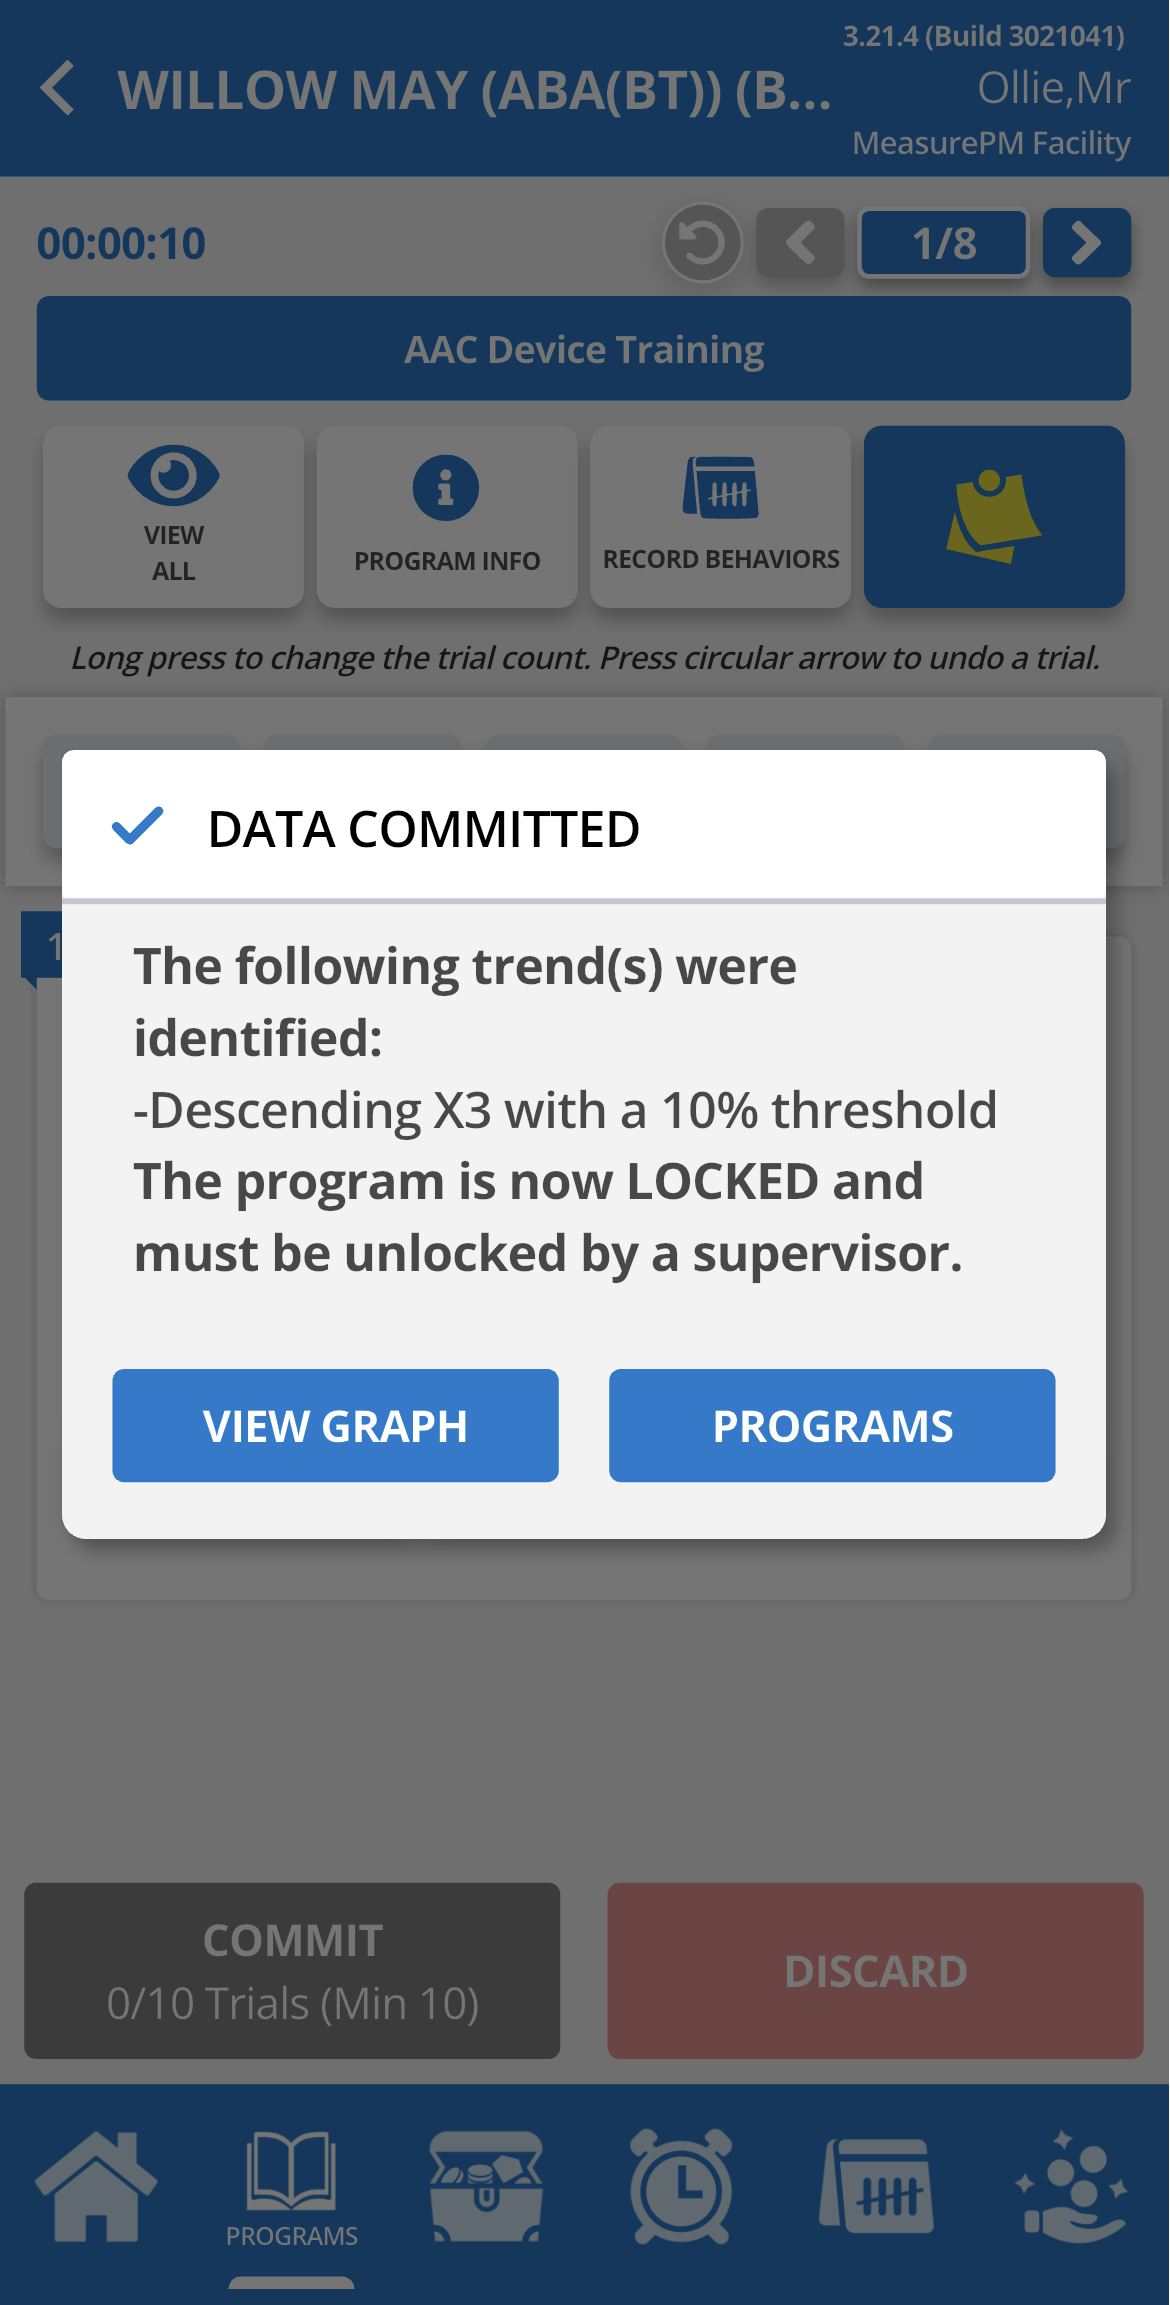 | 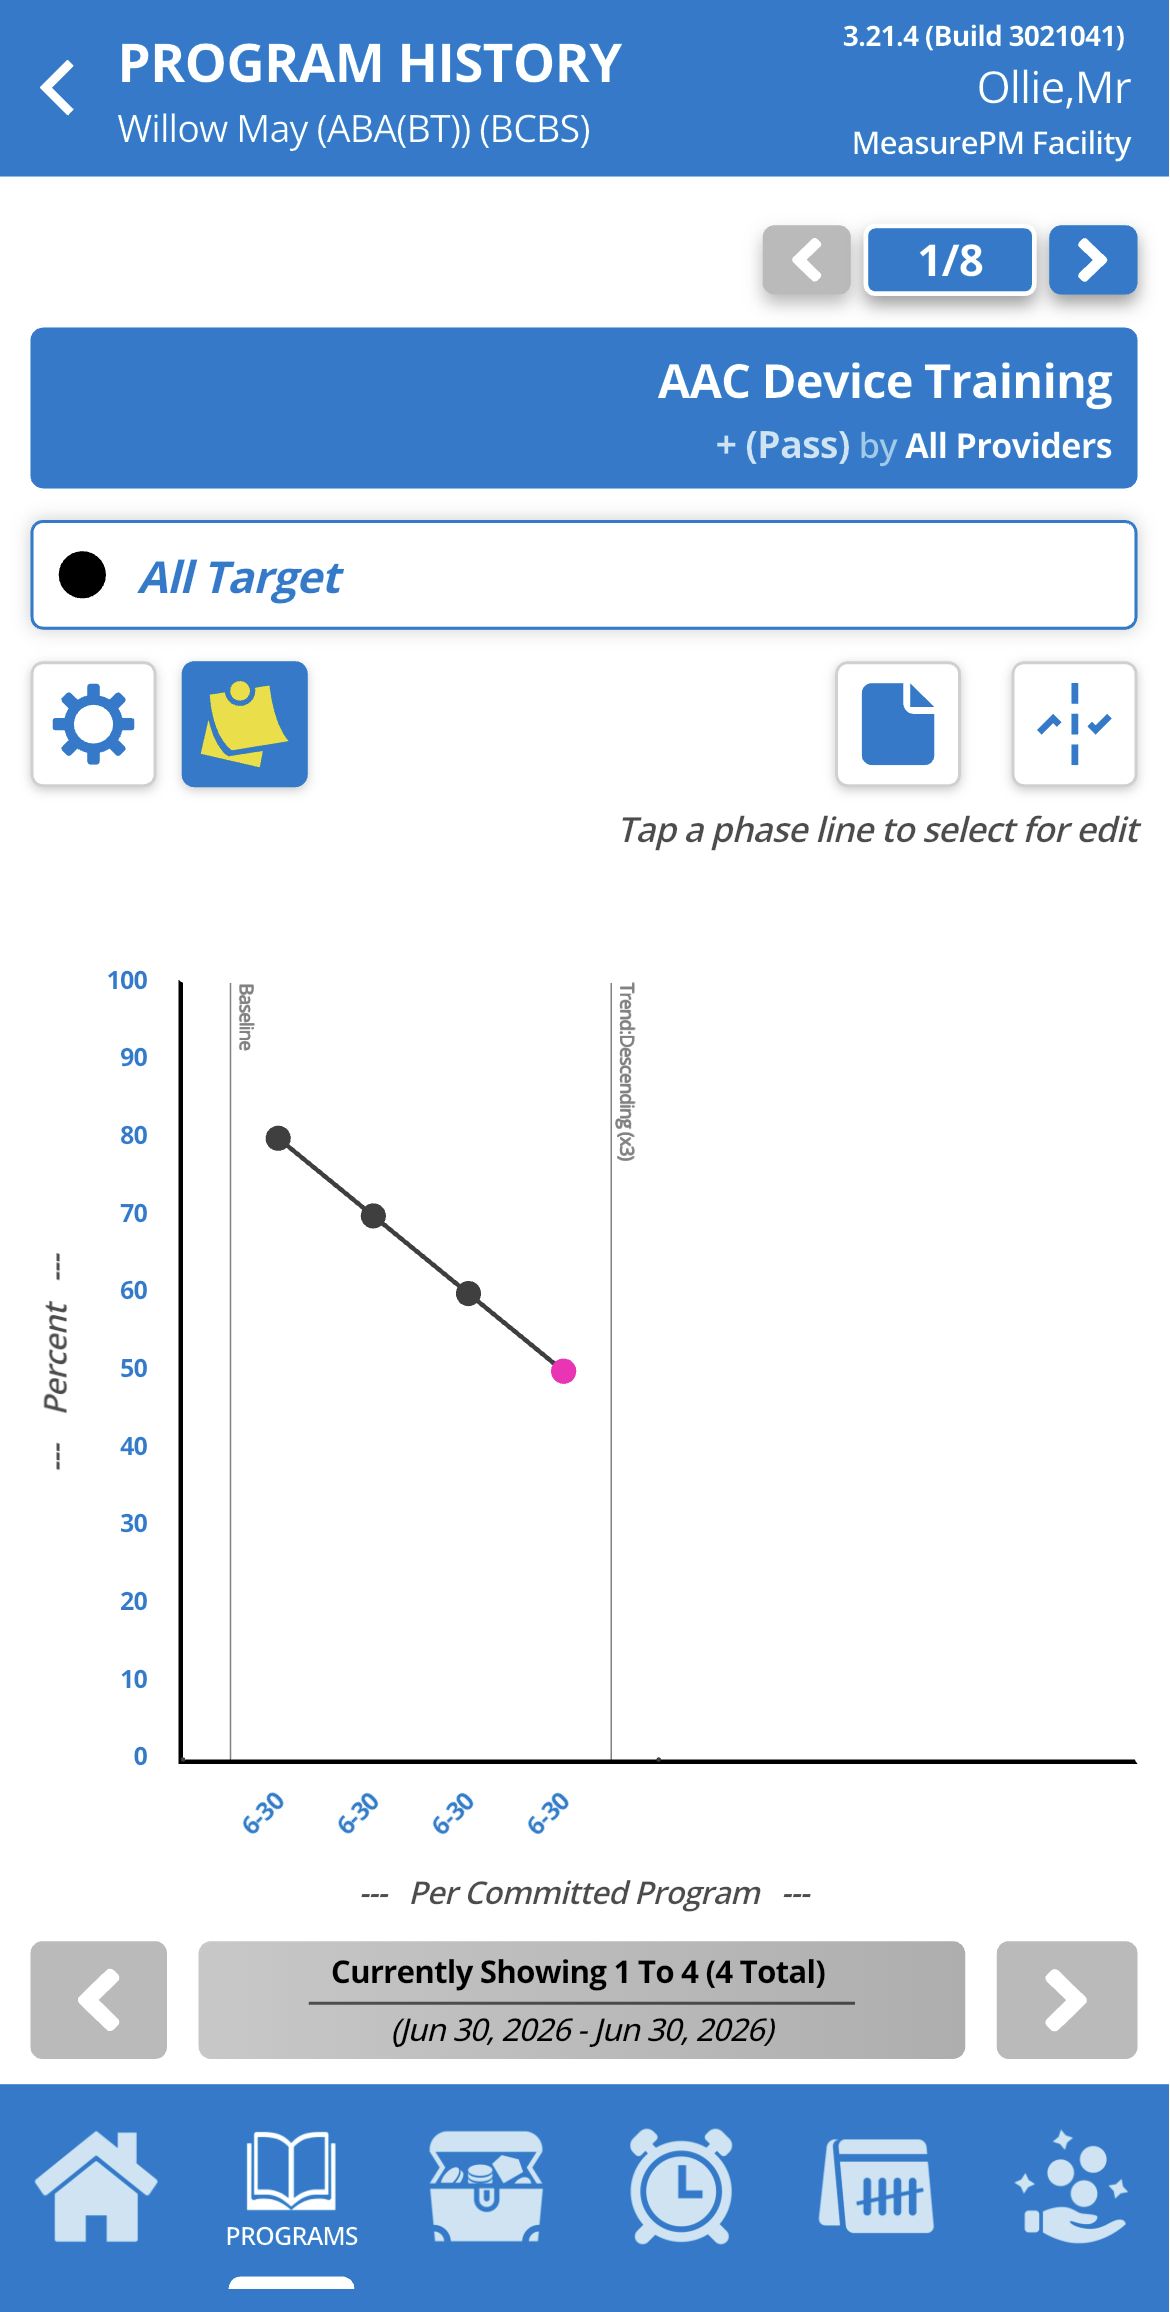 | |
Descending Variable (5) | This trend is detected if 5 consecutive data paths for a given program graph reach an overall descending trend. The percentage designated in the “threshold column” indicates a percent of decrease that should be considered “descending” from the first data point point to the sixth data point for the trend to be triggered. |
| 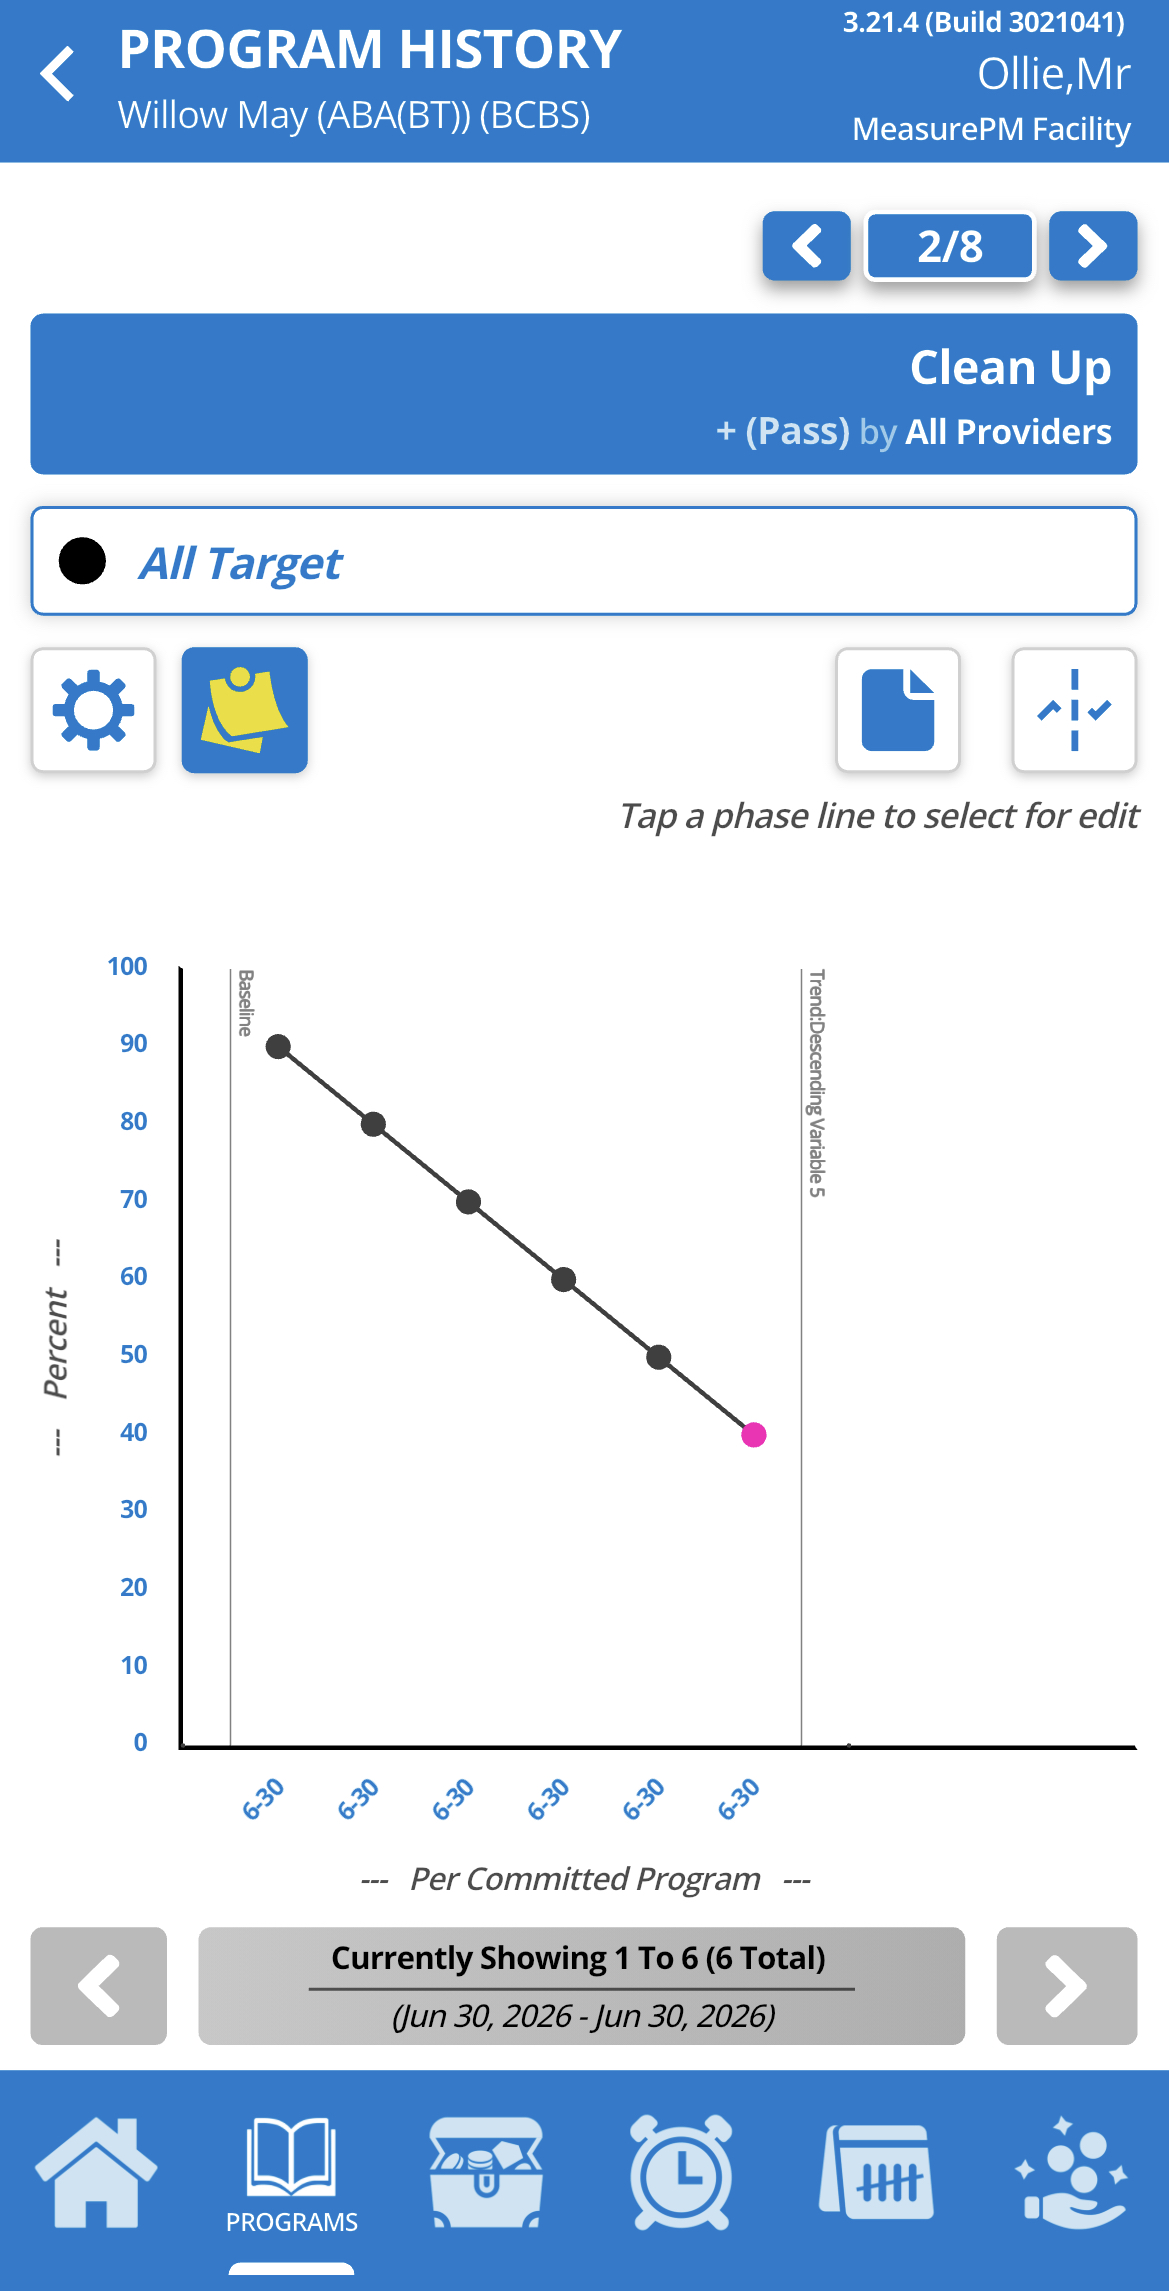 | |
Ascending (x3) | This trend is detected when a program graph reaches 3 consecutive data paths that are each a higher value than the one before it. The percentage designated in the “threshold column” indicates a percent of increase that should be considered “ascending” from the previous data point for the trend to be triggered.
|  | 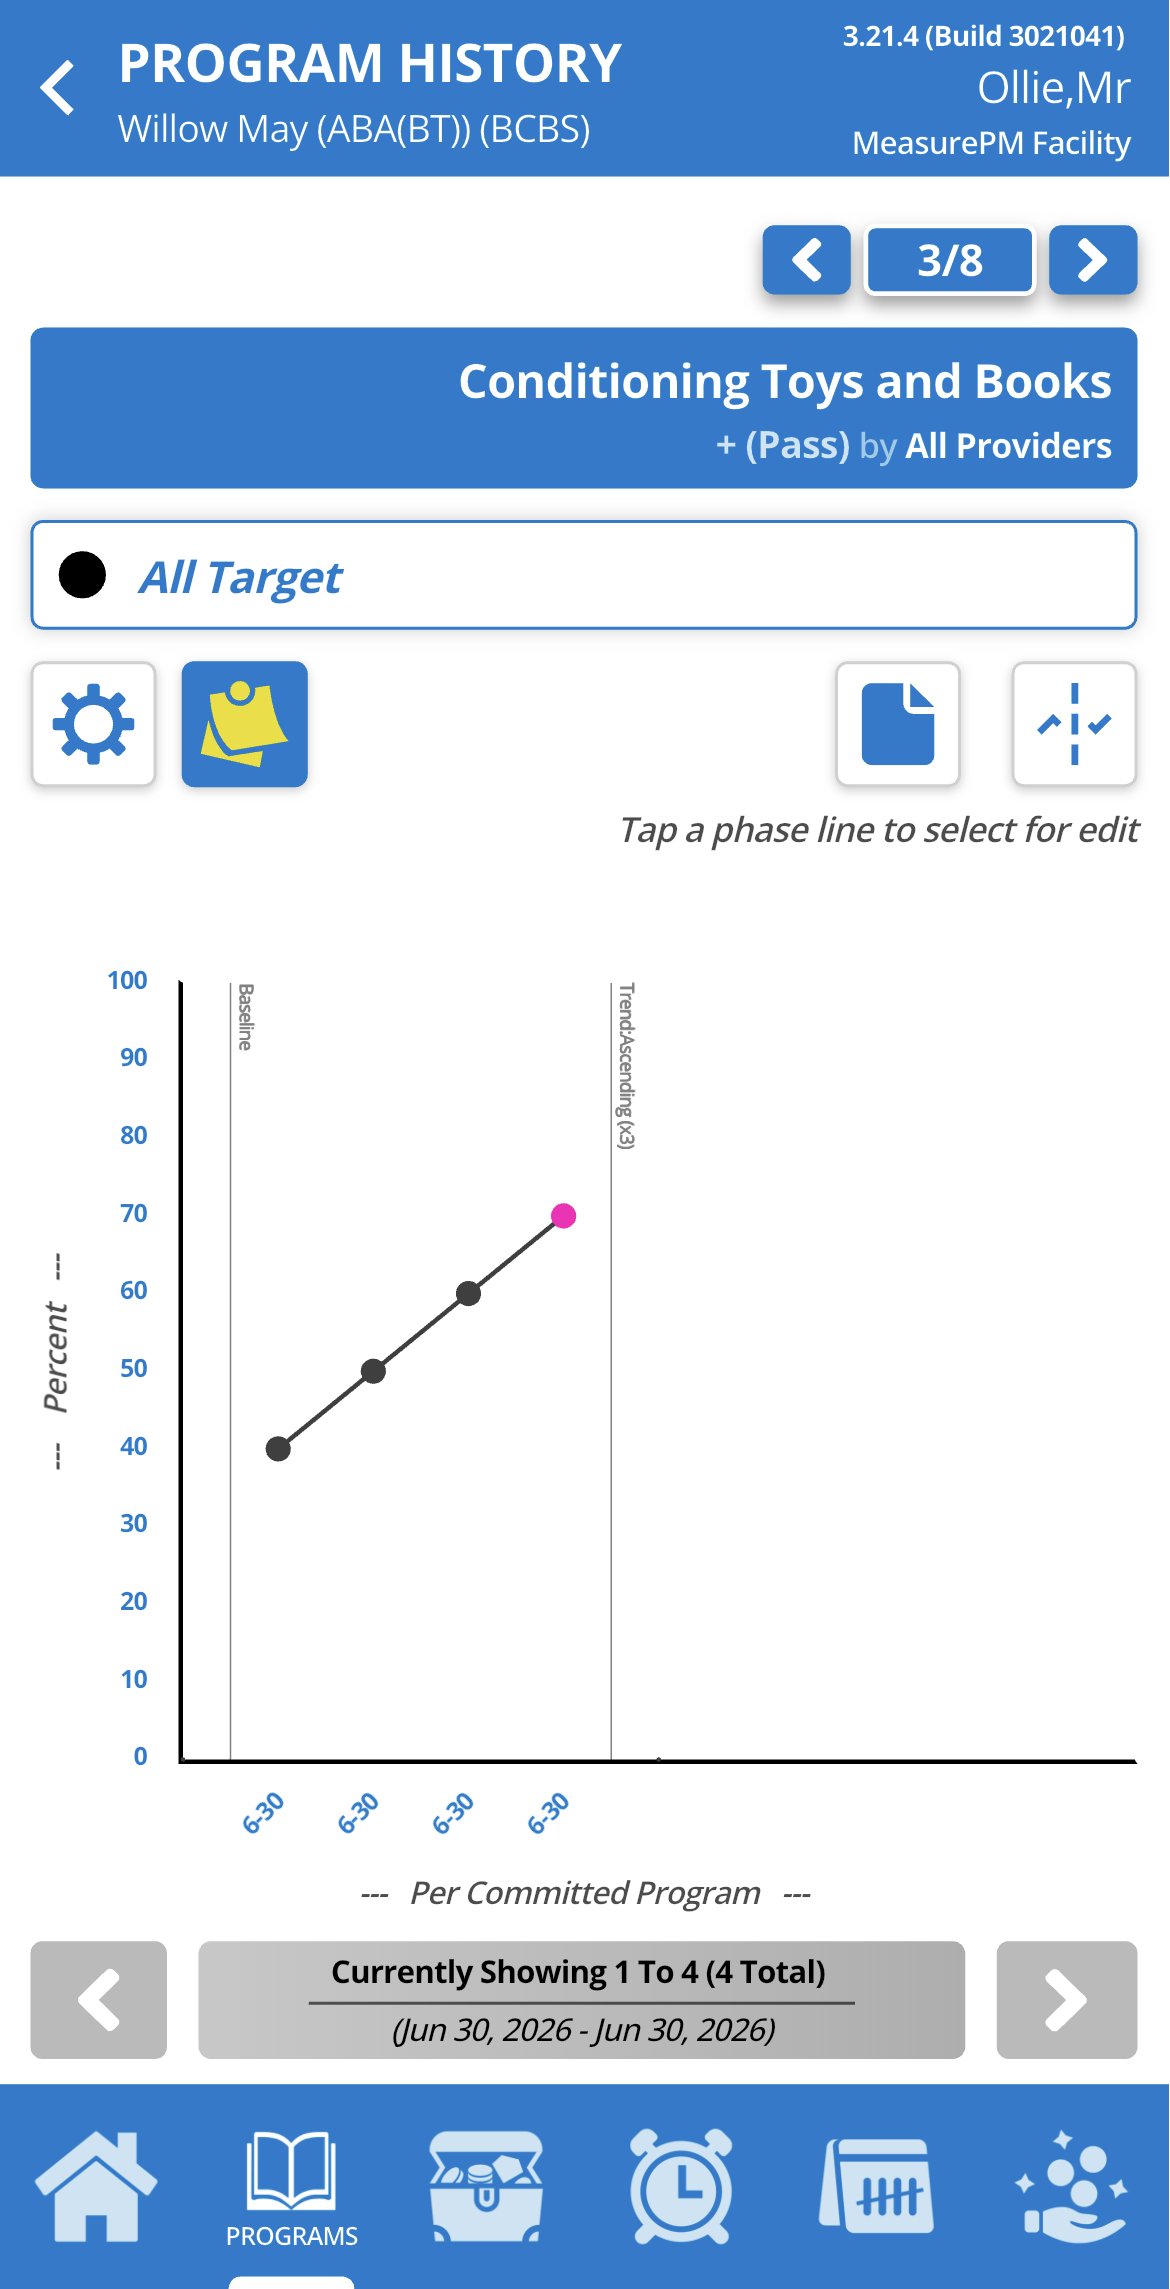 | |
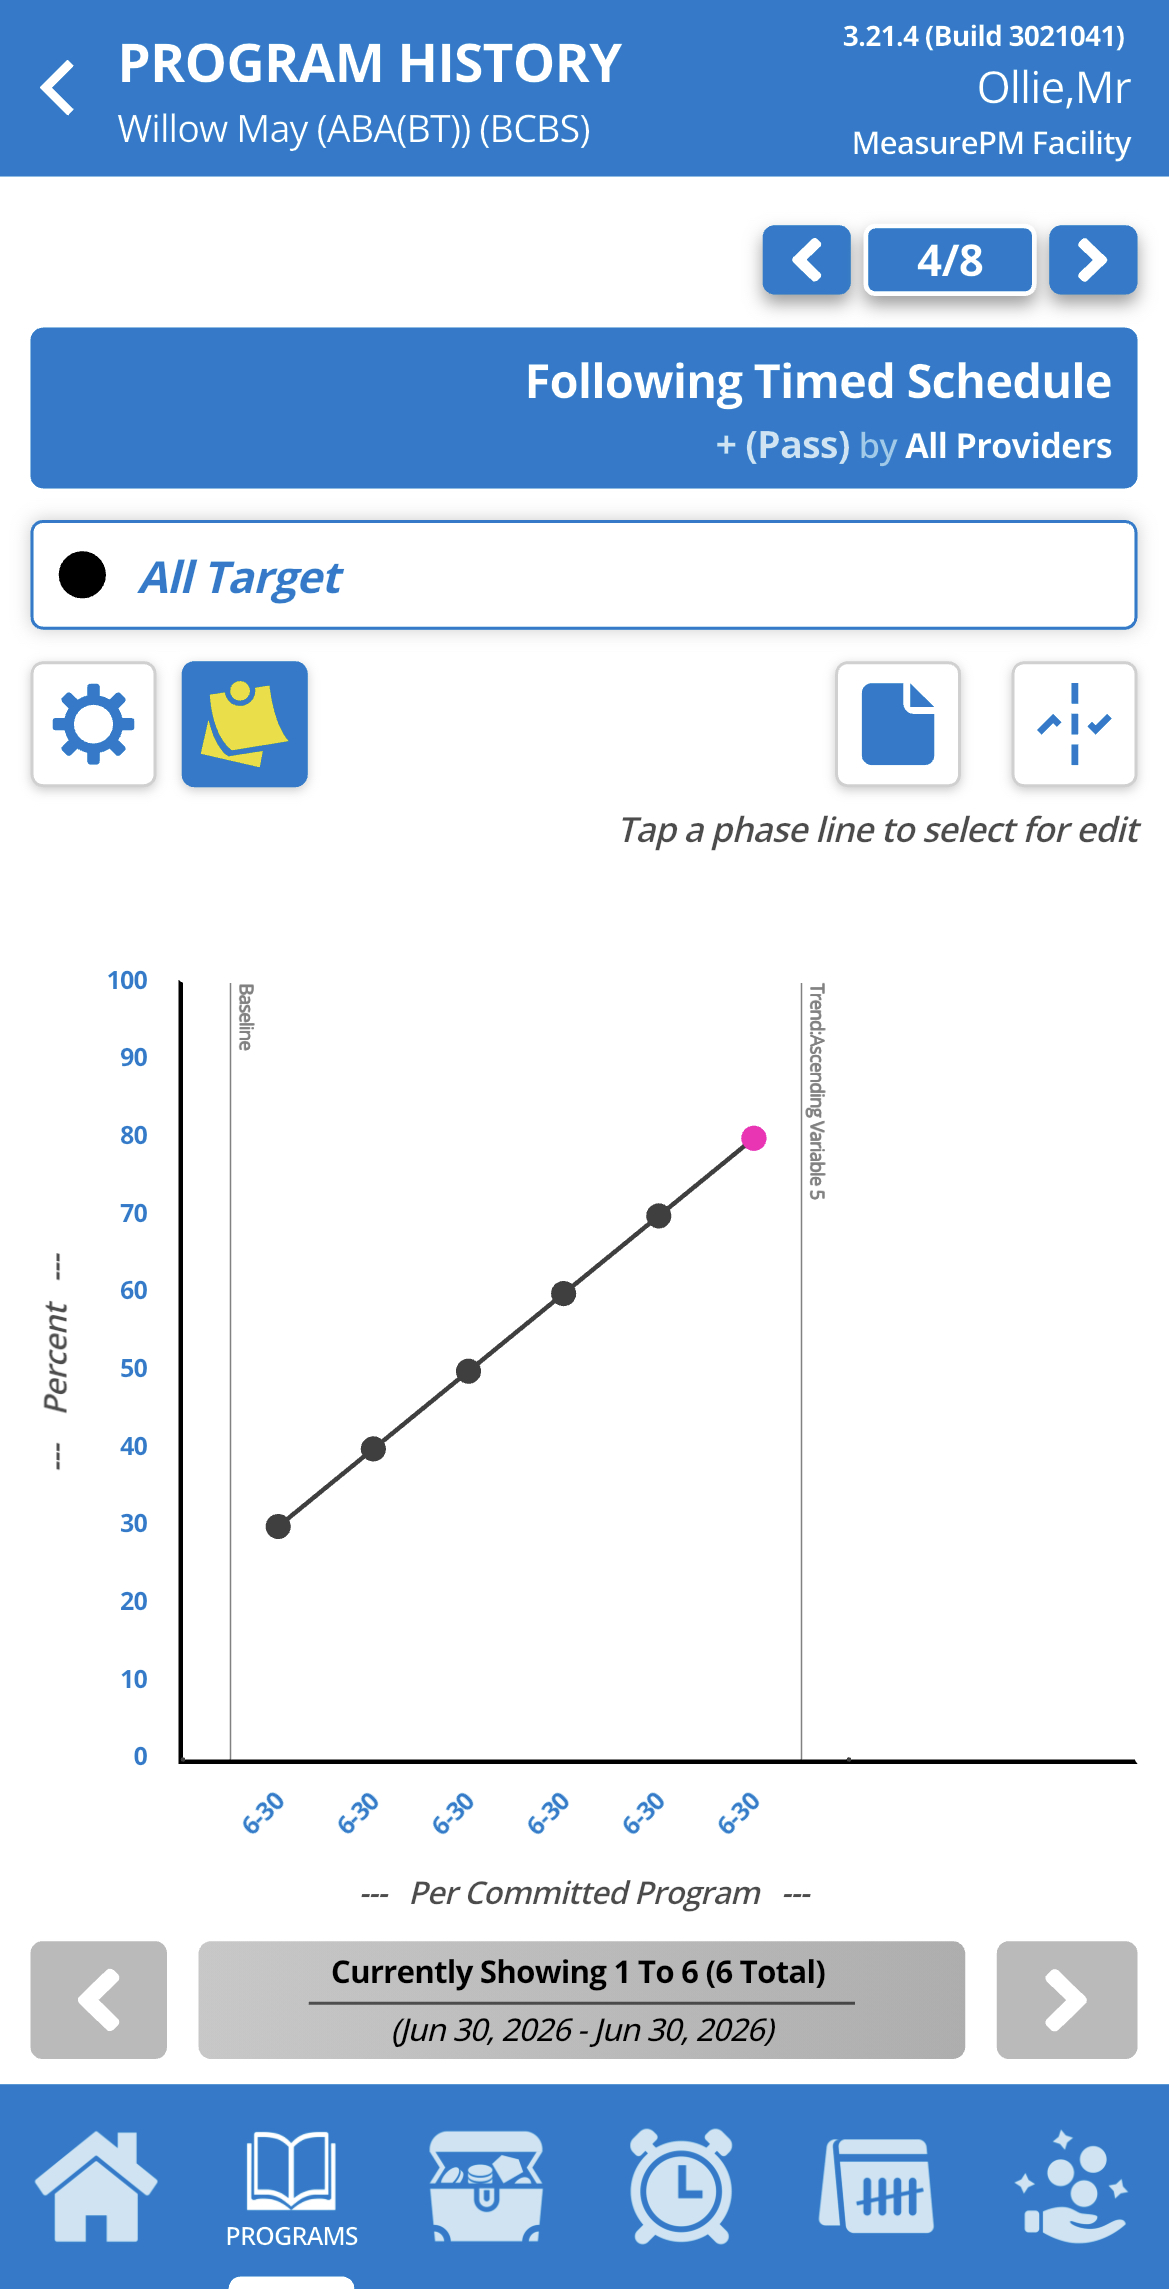
Ascending Variable (5) | This trend is detected if 5 consecutive data paths for a given program graph reach an overall ascending trend. The percentage designated in the “threshold column” indicates a percent of increase that should be considered “ascending” from the first data point point to the sixth data point for the trend to be triggered. | 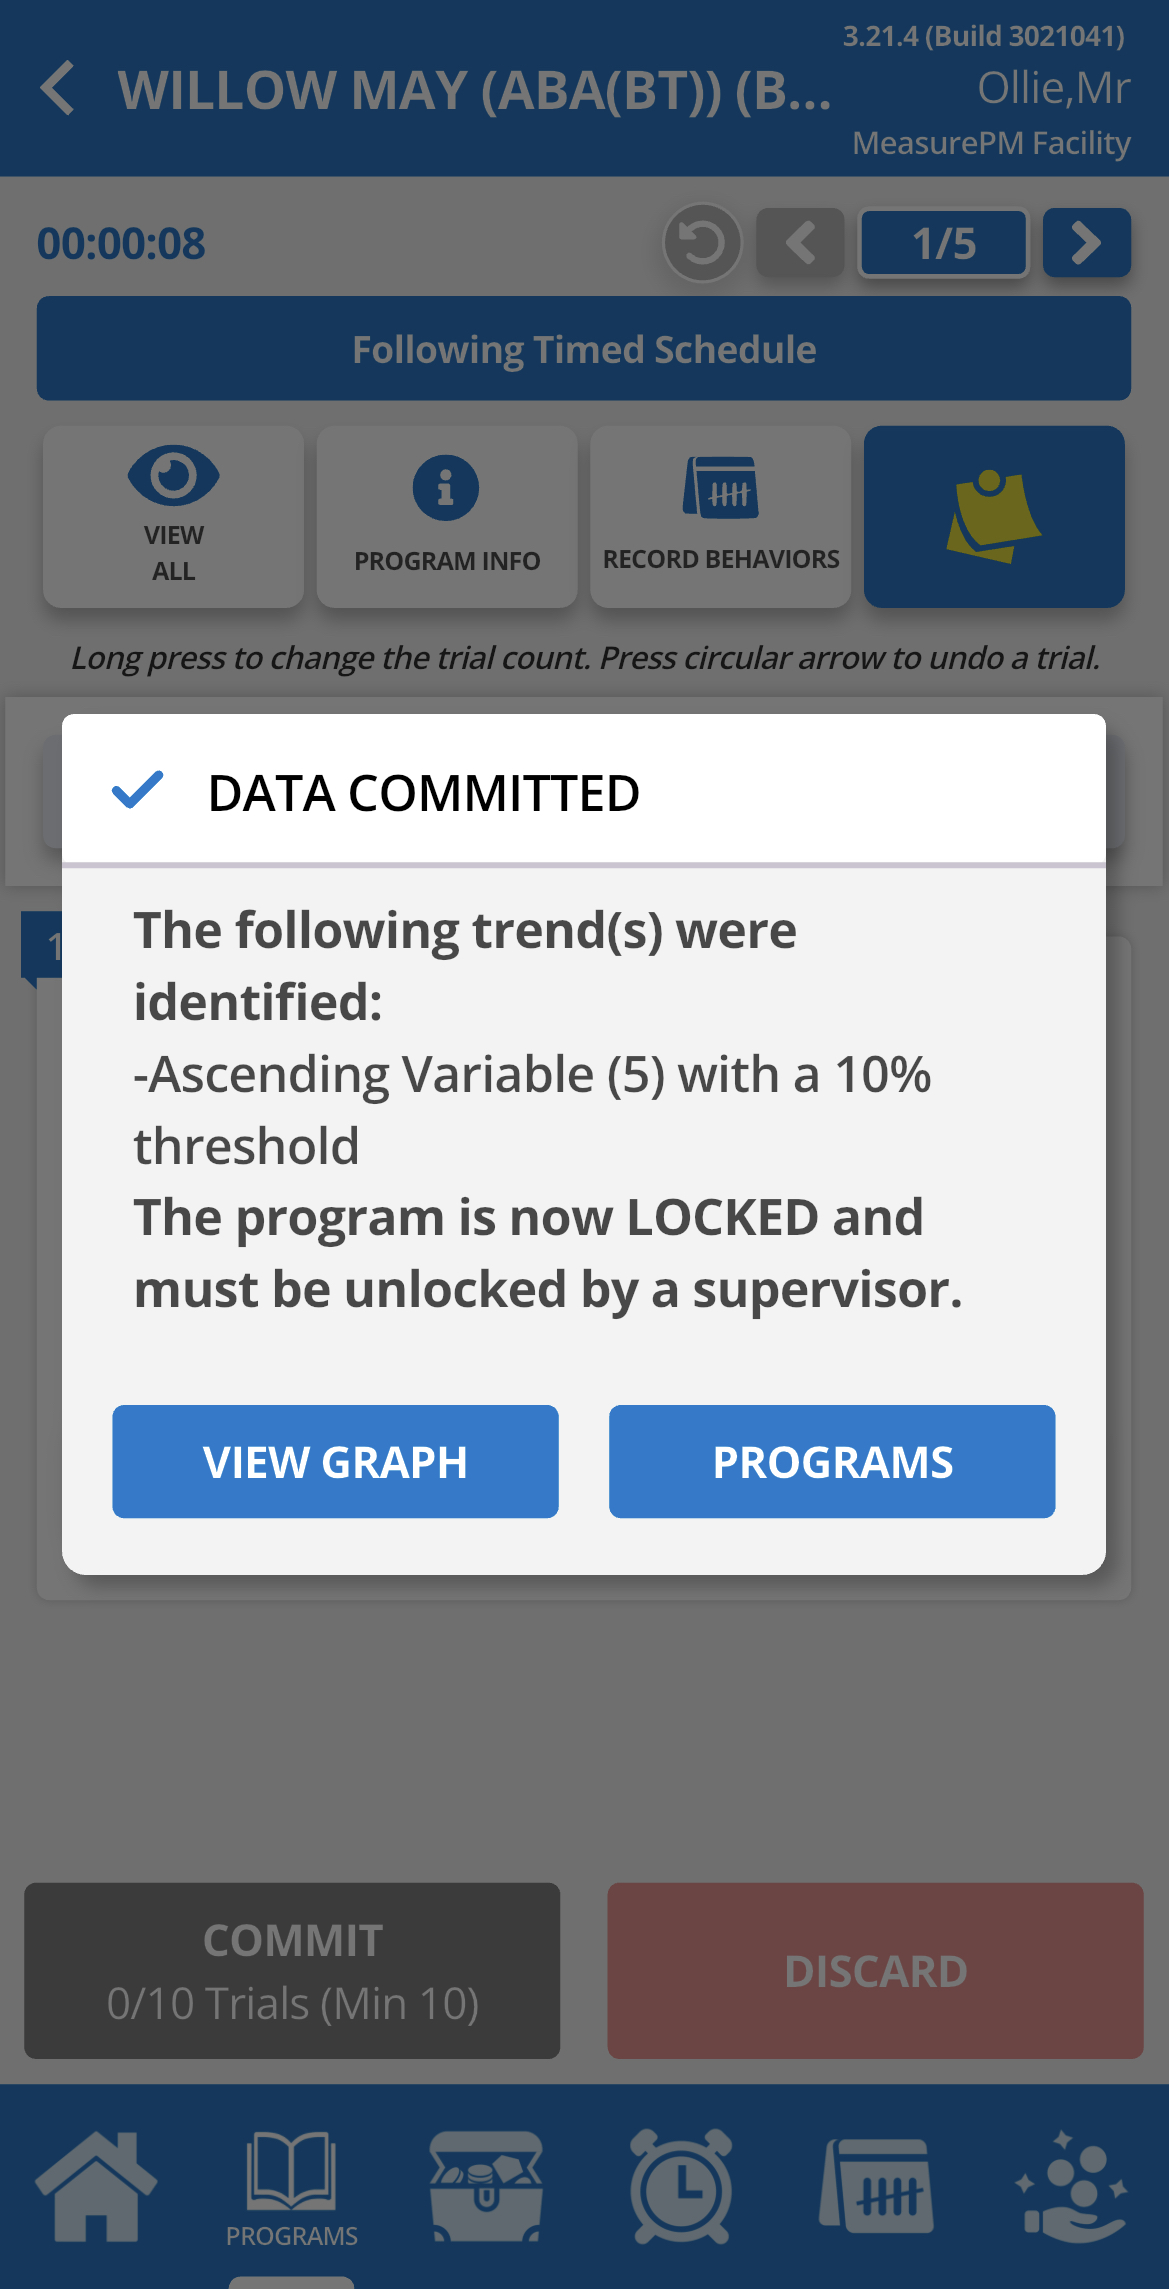 |
| |
Flat (5) | This trend is detected when a program graph reaches 5 consecutive data paths that remain within the percentage of variance (up or down) that is designated in the “threshold” column. |
| 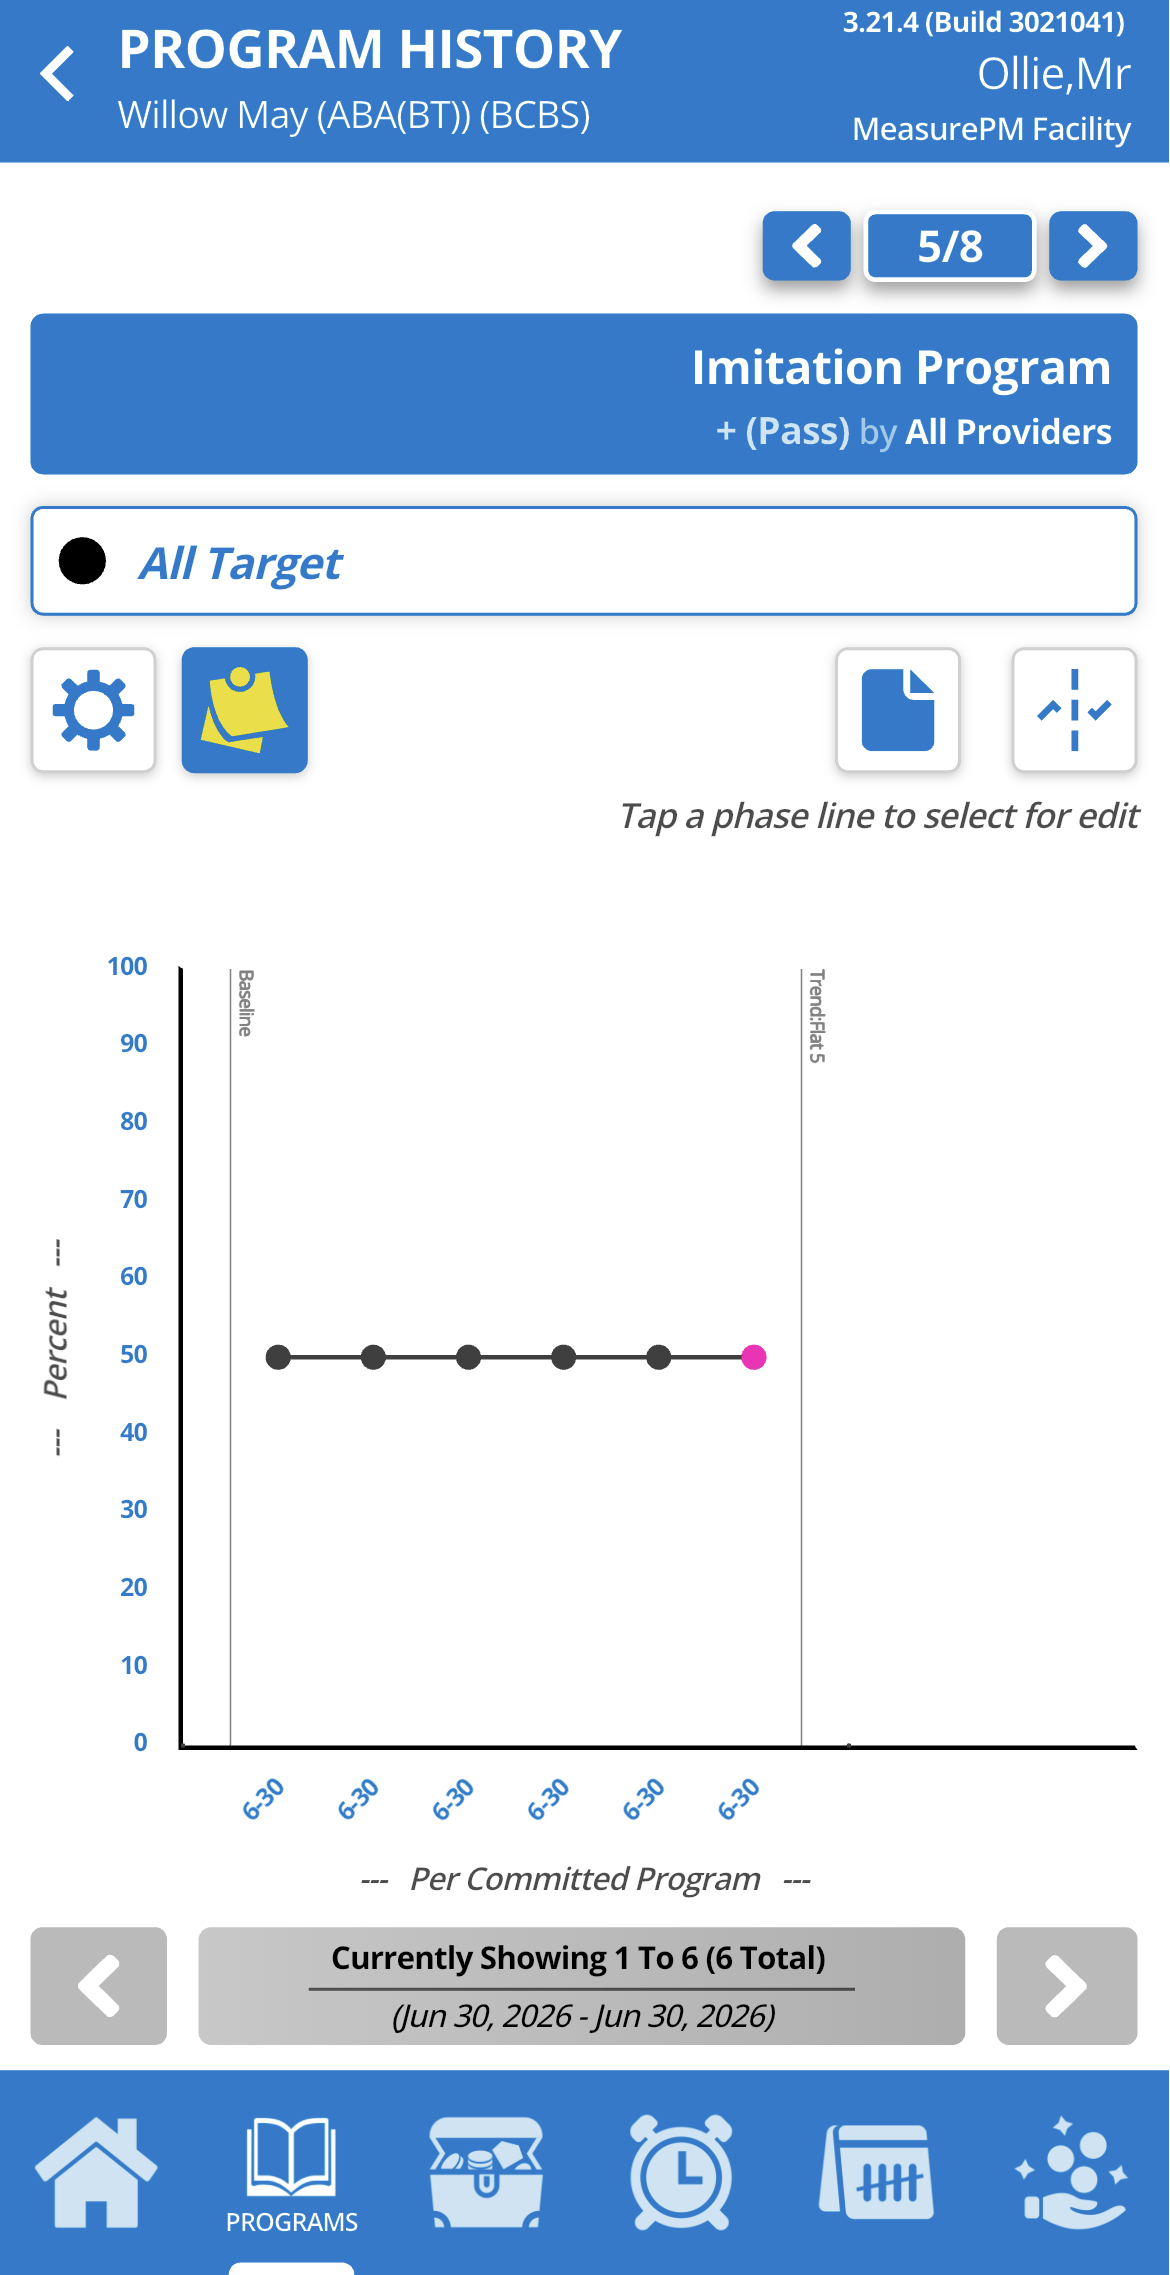 | |
Worse than X% (3/5) | This trend is detected if 3 out of the 5 most recent data points are below the percentage designated in the "threshold column".
|
| 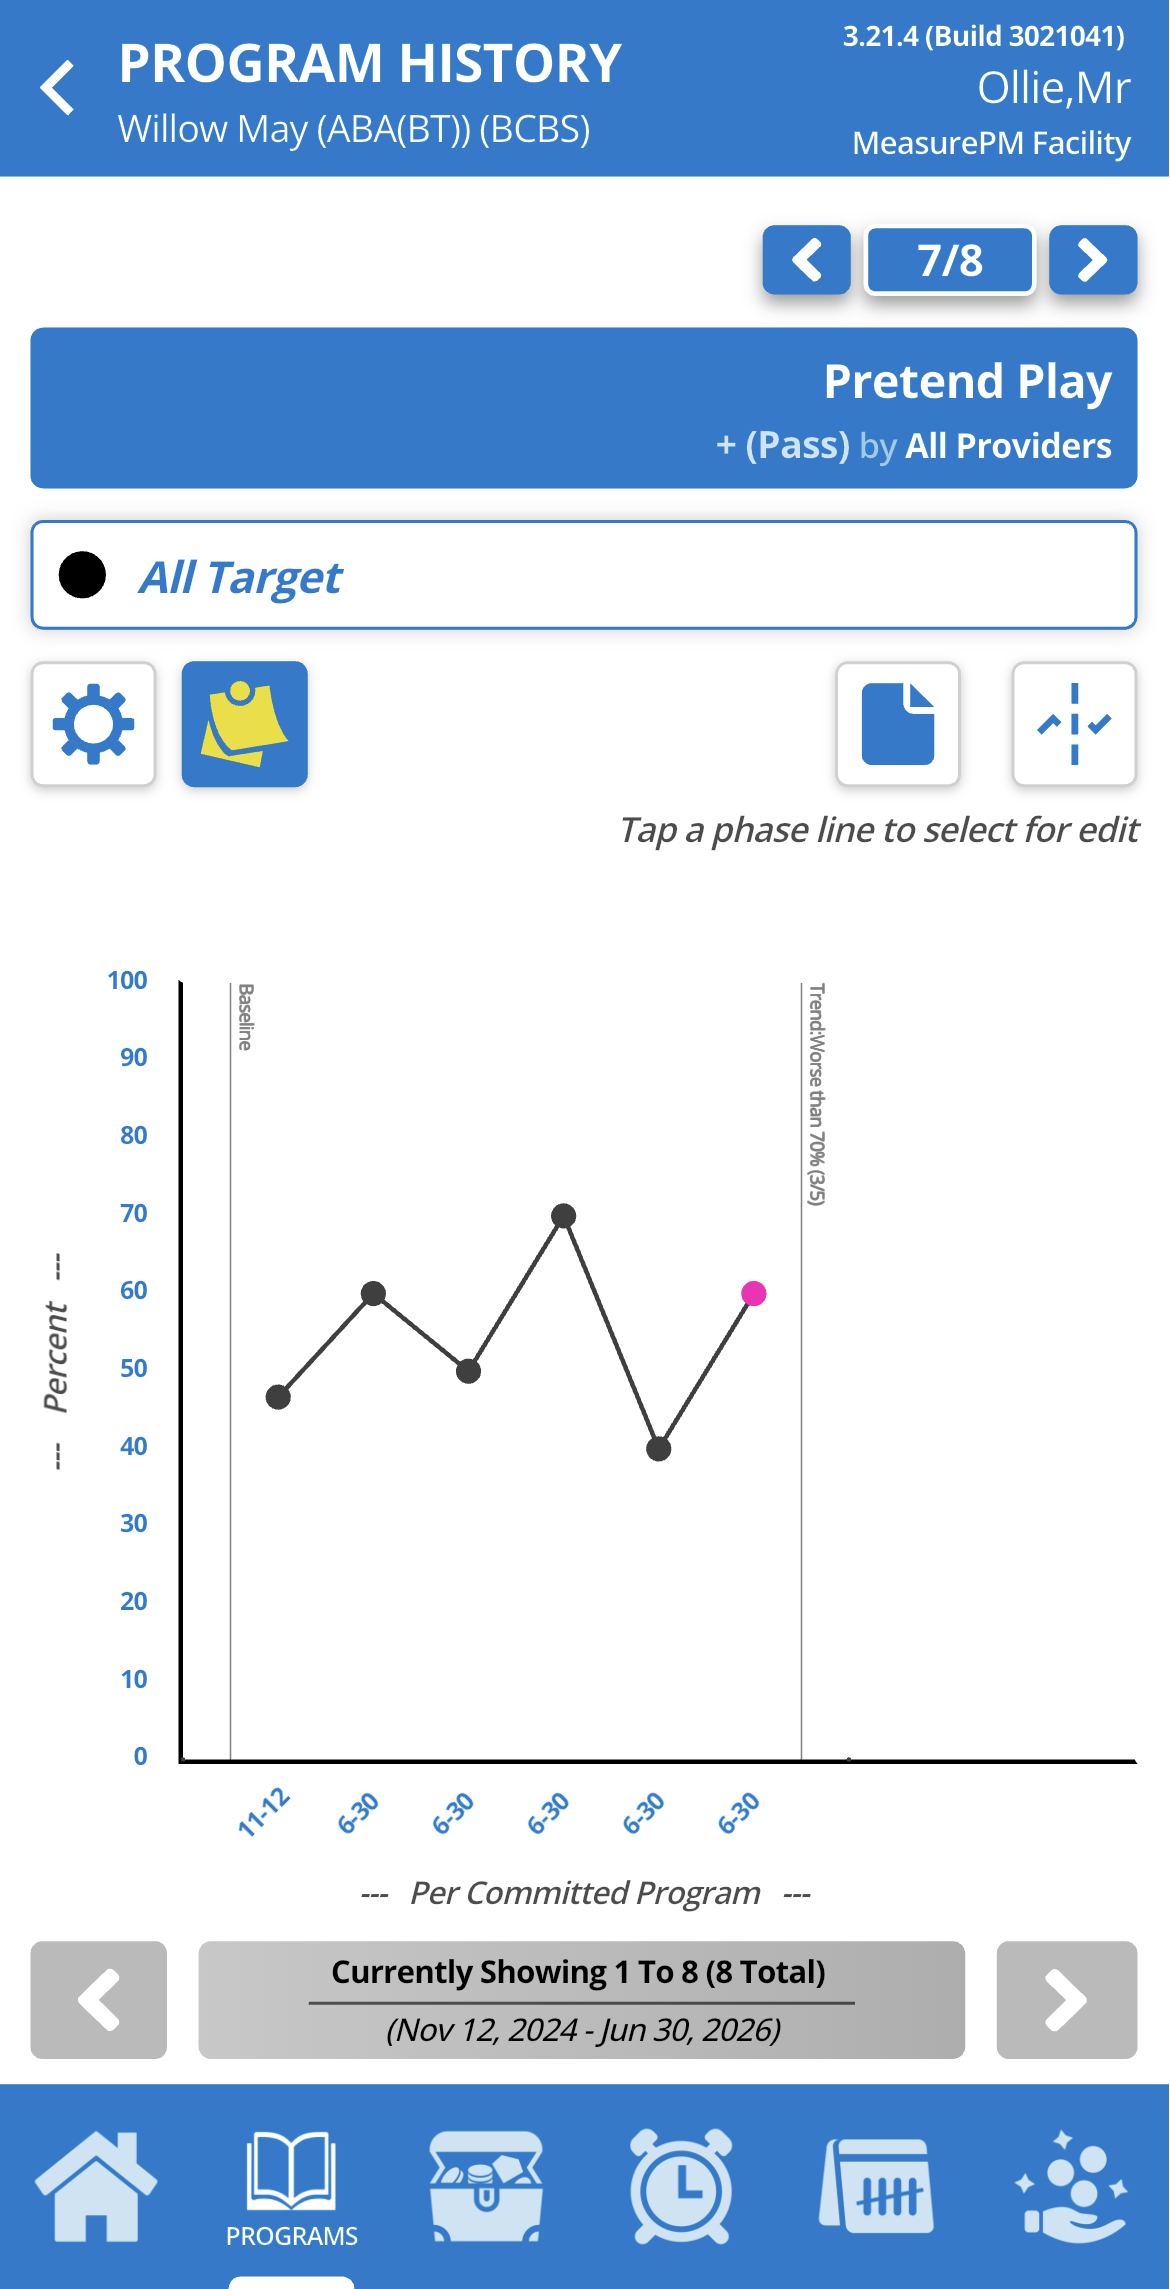 | |
Worse than X% (3) | This trend is detected if the 3 most recent data points are below the percentage designated in the "threshold column".
|  | 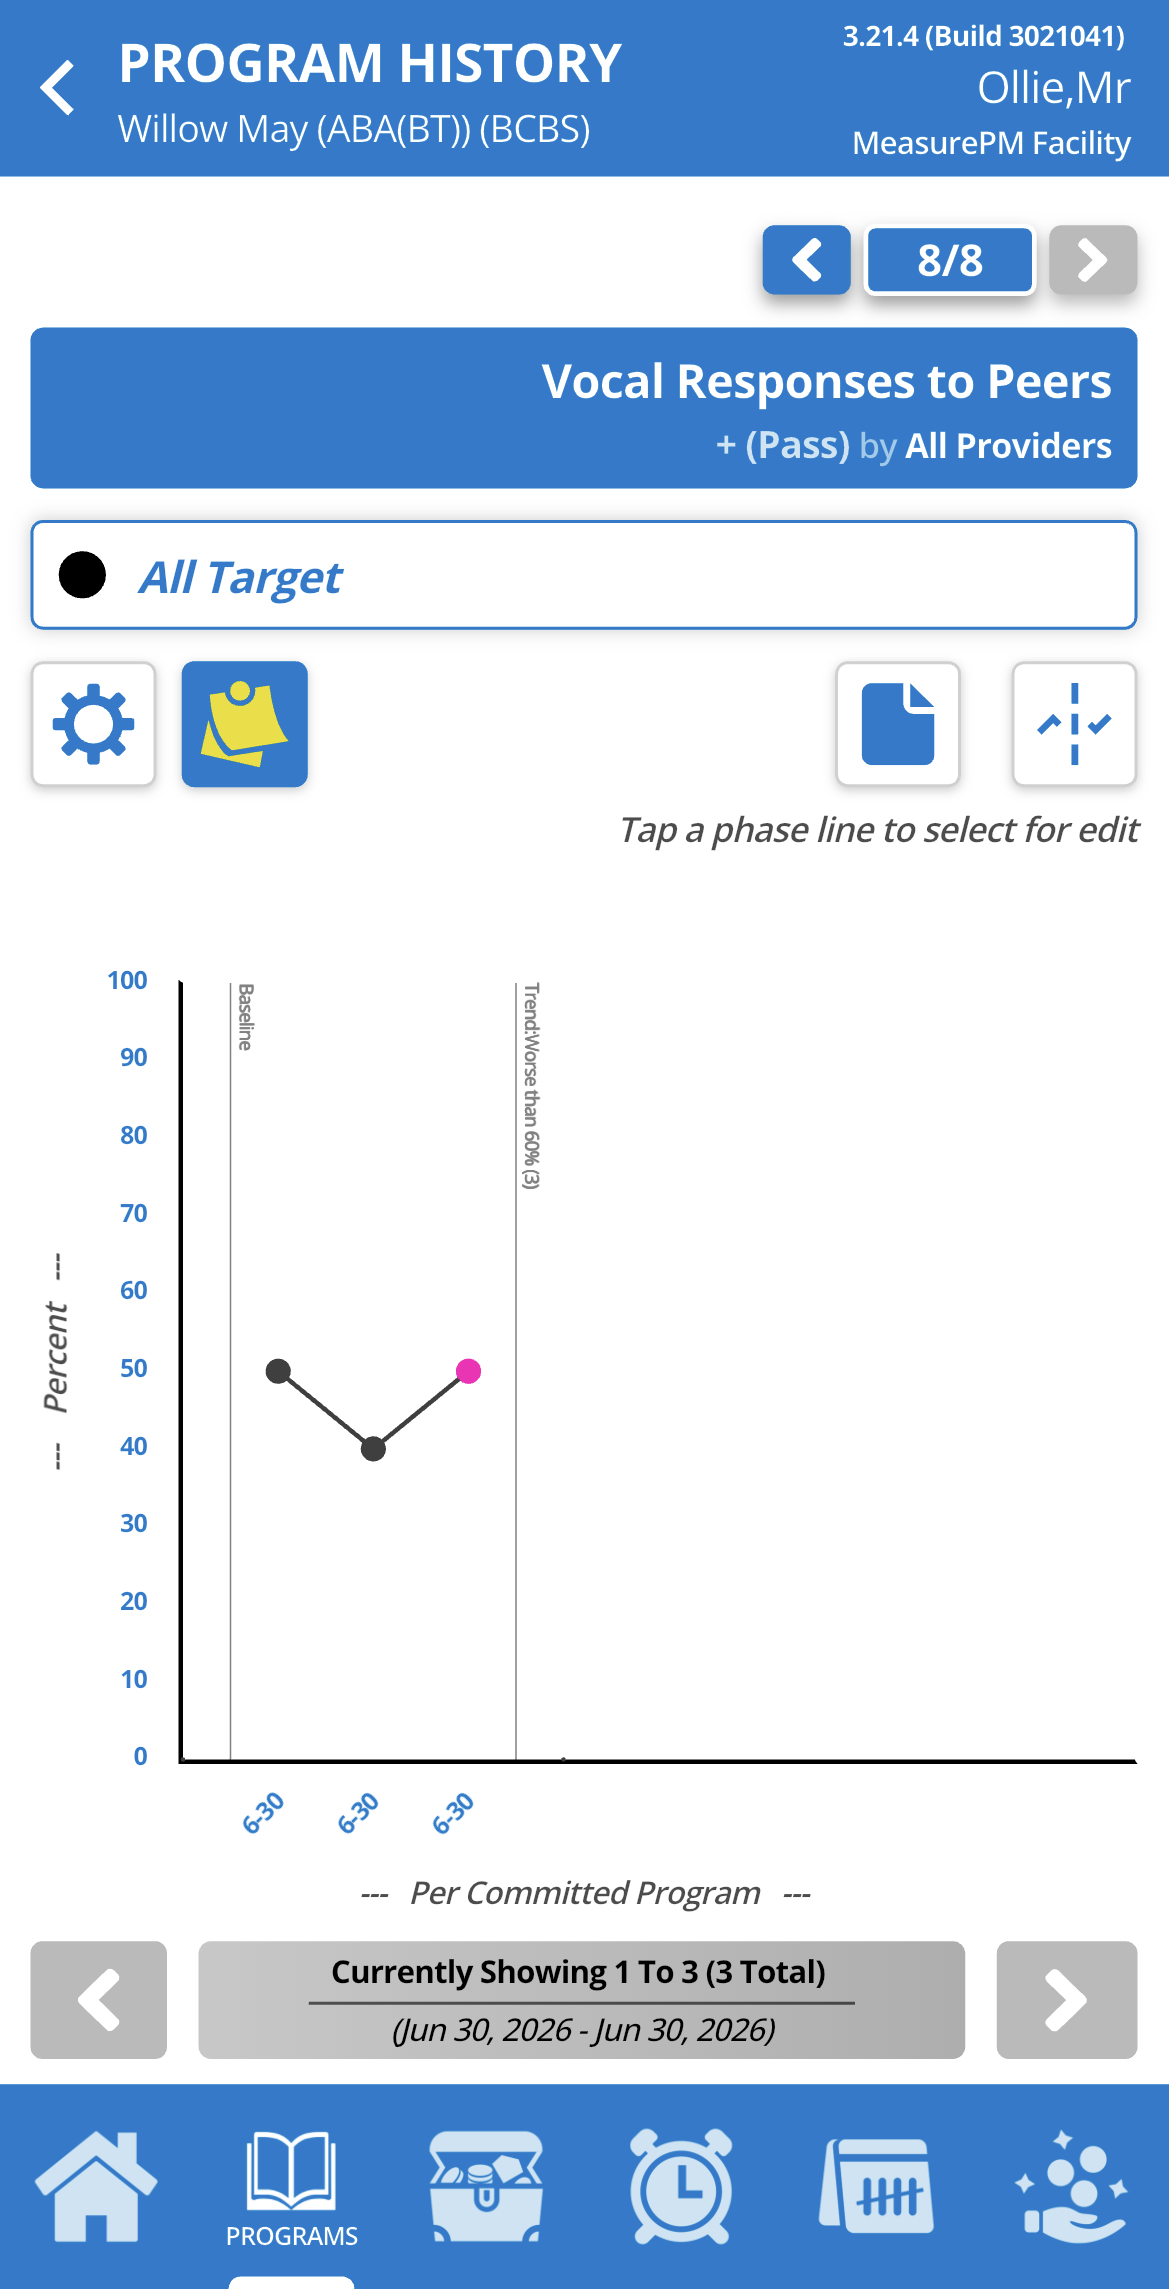 | |
Better than X% (3/5) | This trend is detected if 3 out of the 5 most recent data points are above the percentage designated in the "threshold column".
|
| 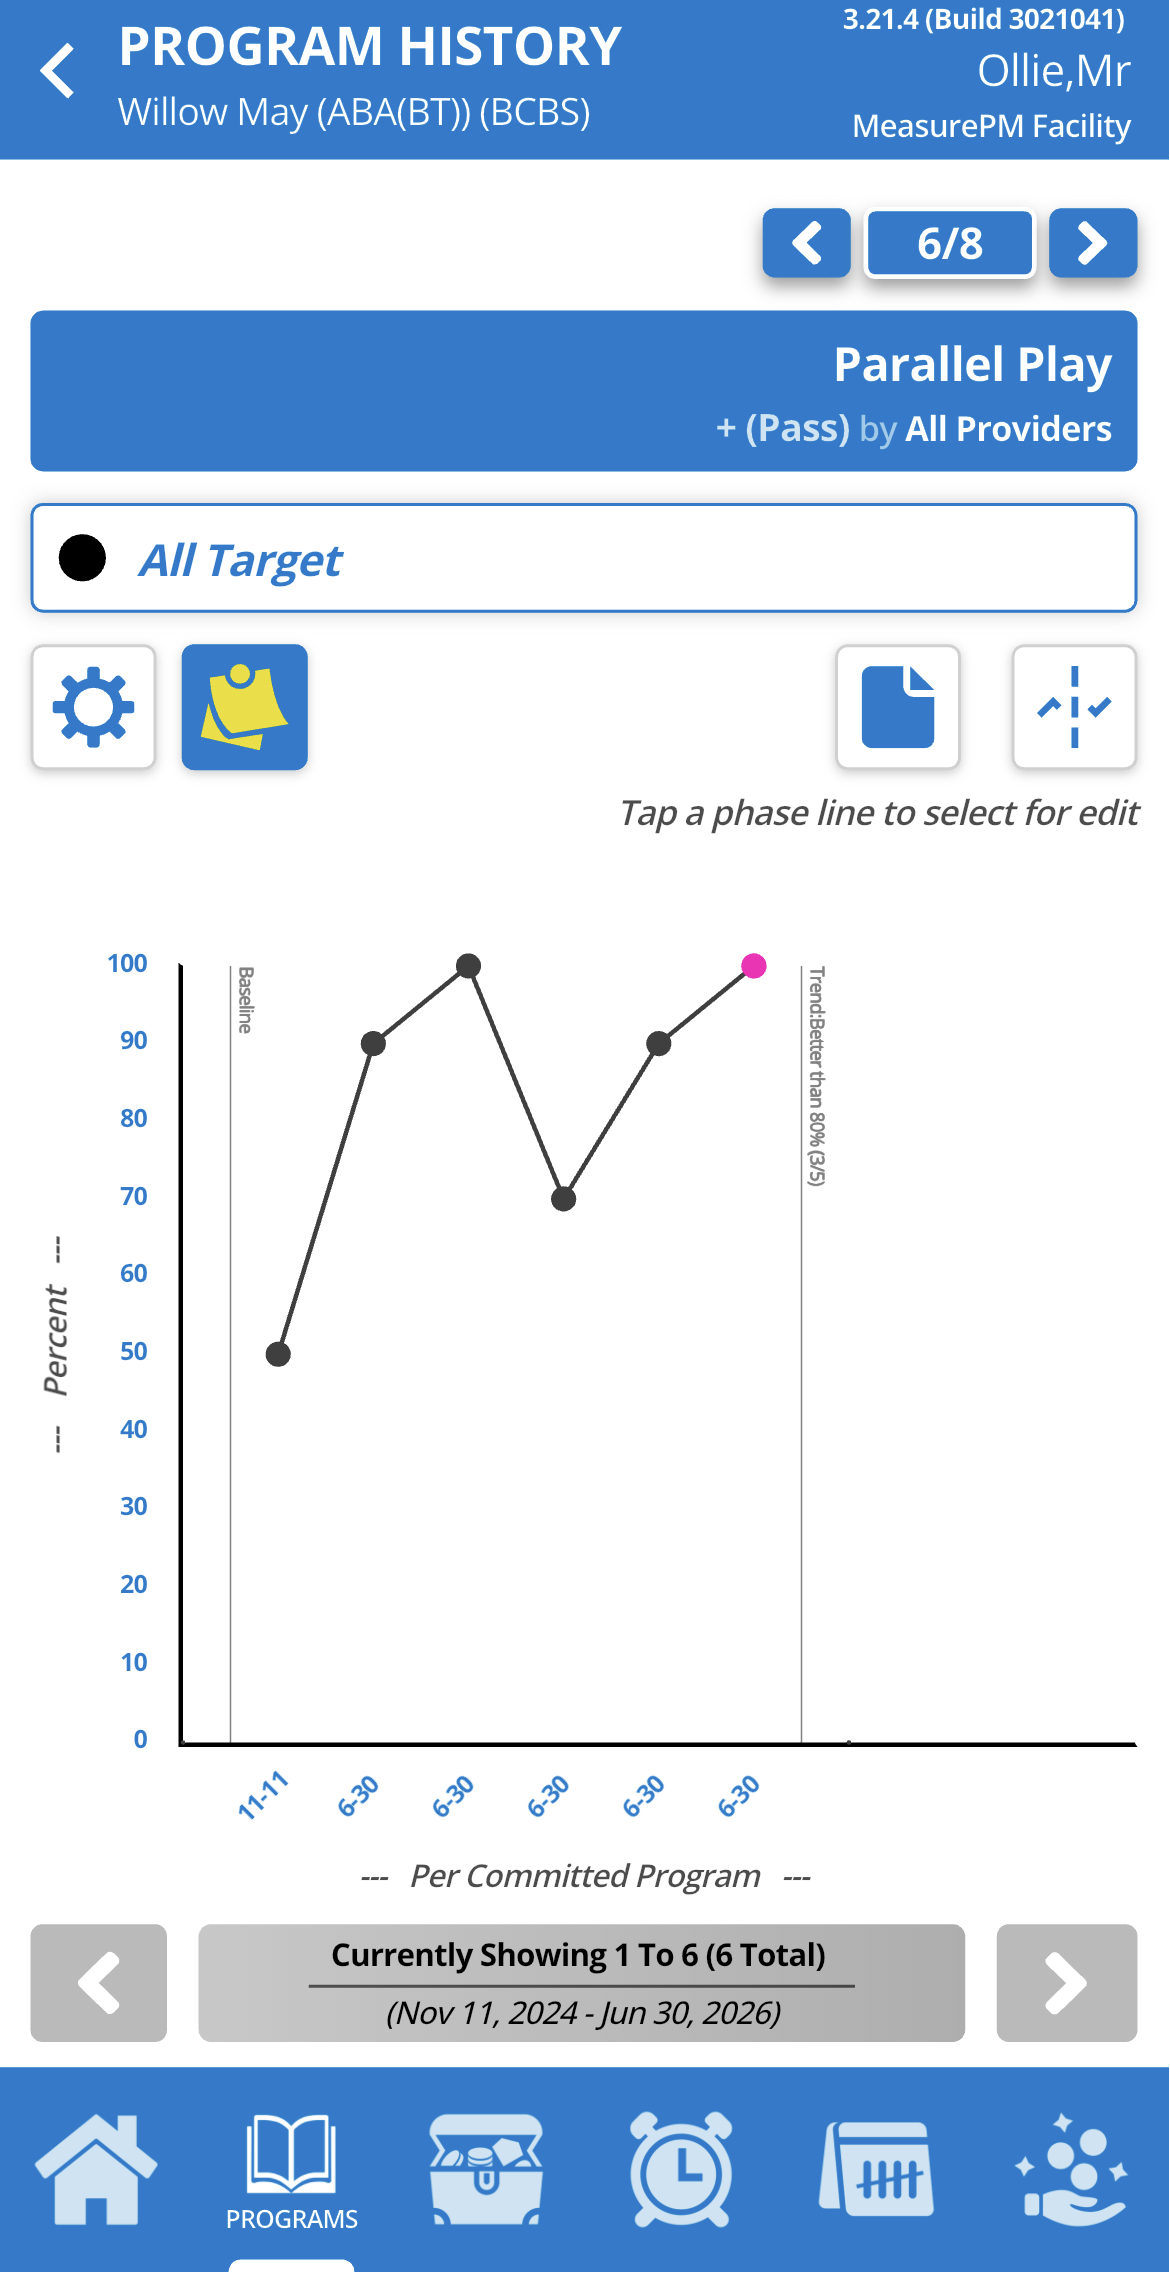 | |


Showing Detection Markers on Graphs
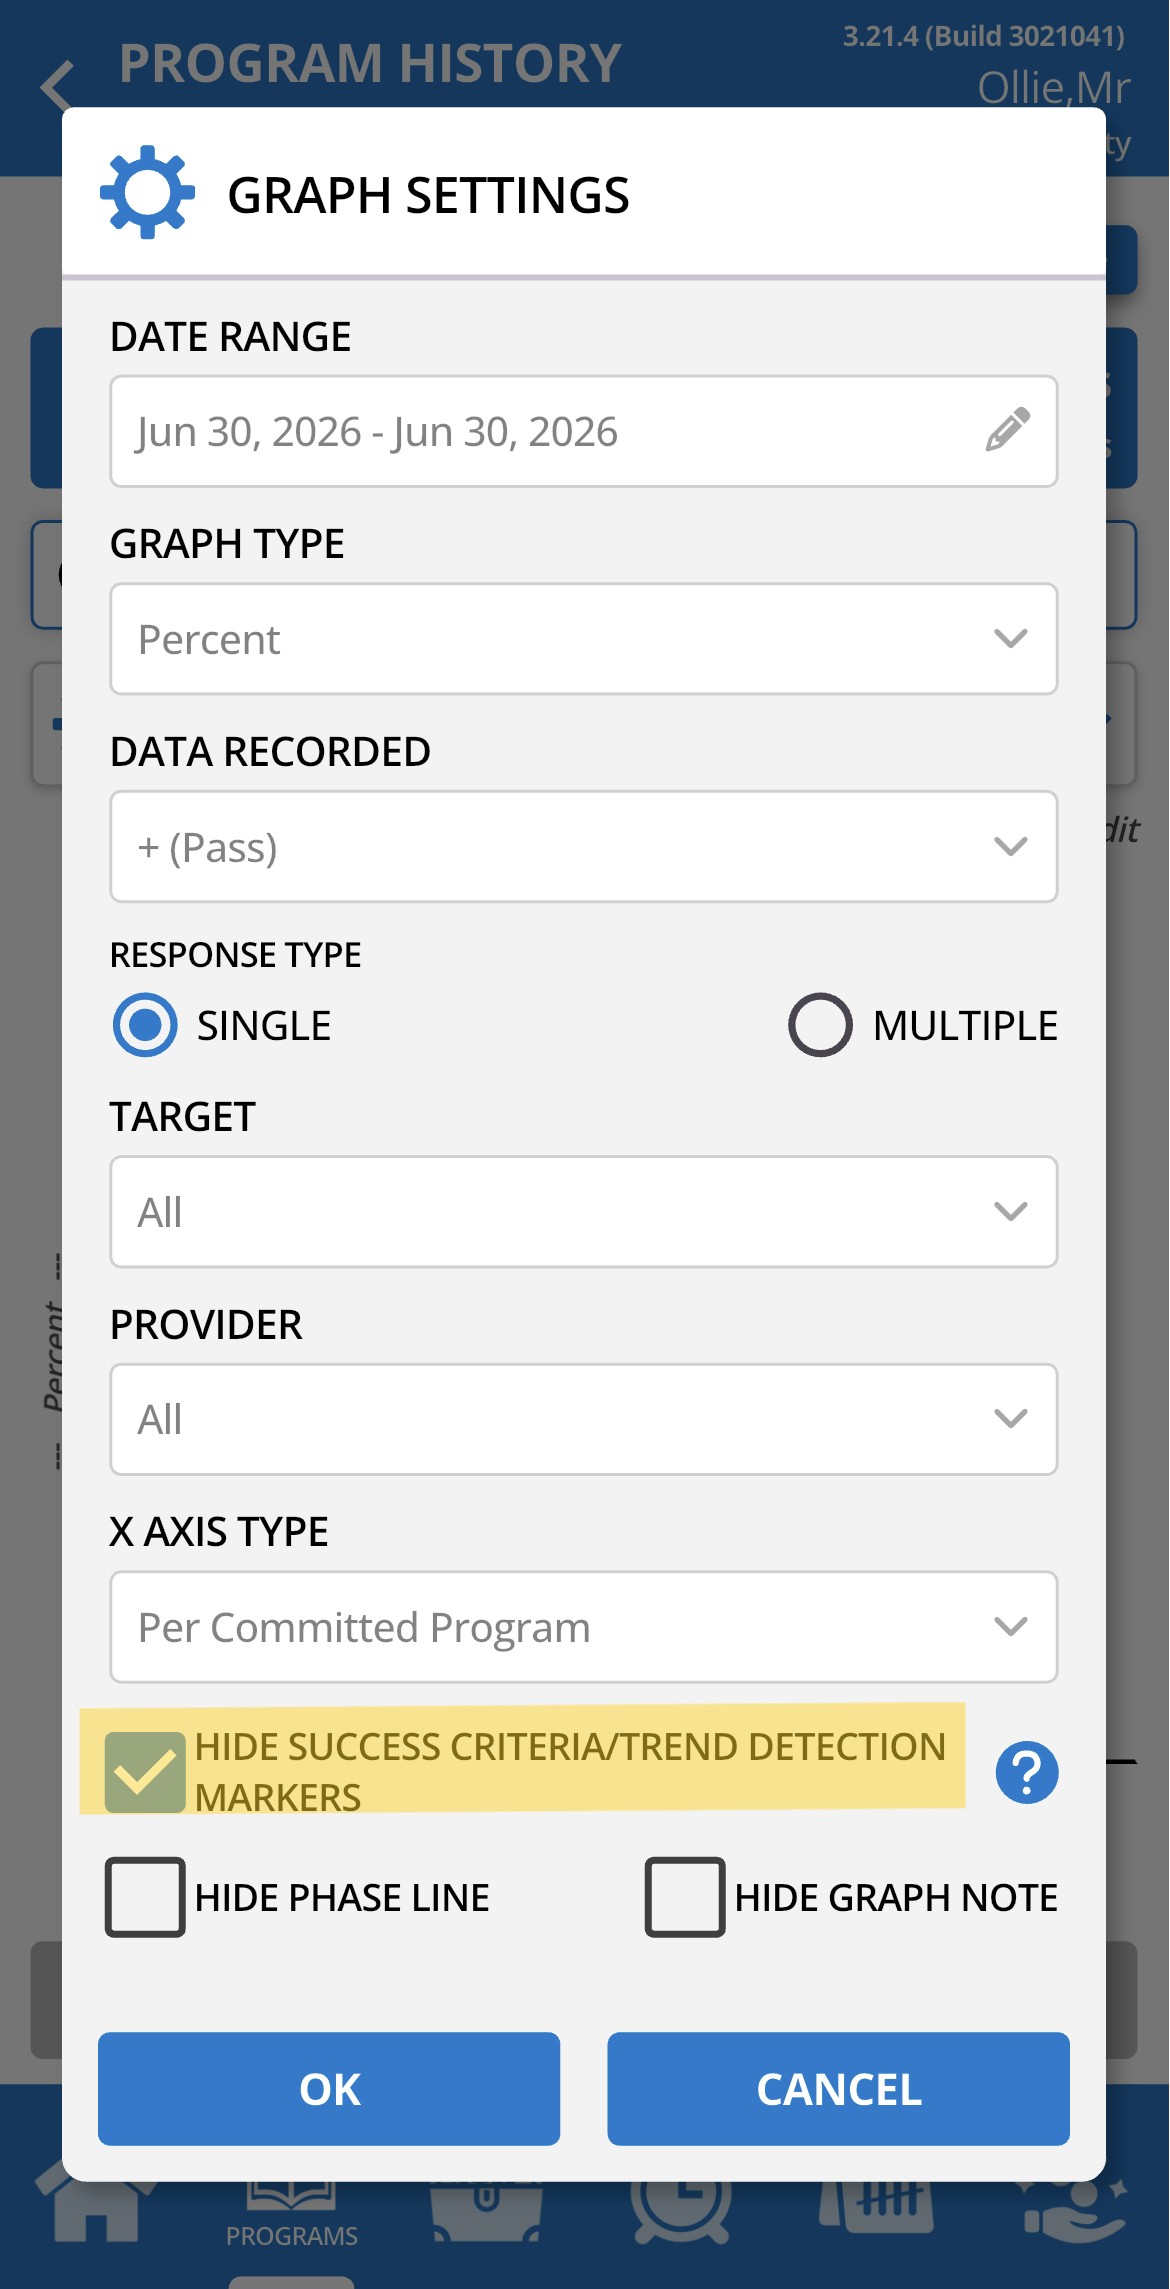
Within client graphs users can opt to view/hide decision point indicators. If a trend has been detected, the point of detection can be highlighted in color on the graph (see below for examples). If you would like the decision point marker to be hidden, please leave the "Hide Success Criteria/Trend Detection Markers" selected. Note, this is the default selection. If you would like the detection marker to show, simply unselect the checkbox. This concept applies to both Web and Mobile-App graphs. 
A "?" icon is displayed beside the detection marker checkbox on both the Web's and Mobile-App's graphing module. If selected, a pop up will open with an explanation of success criteria and tracked trend detection (e.g., how they are indicated on the graph, when they are displayed, etc.).

If the checkbox is unselected, various colored markers will be displayed over the data points on the graph:
| Pink | Trend Detected | 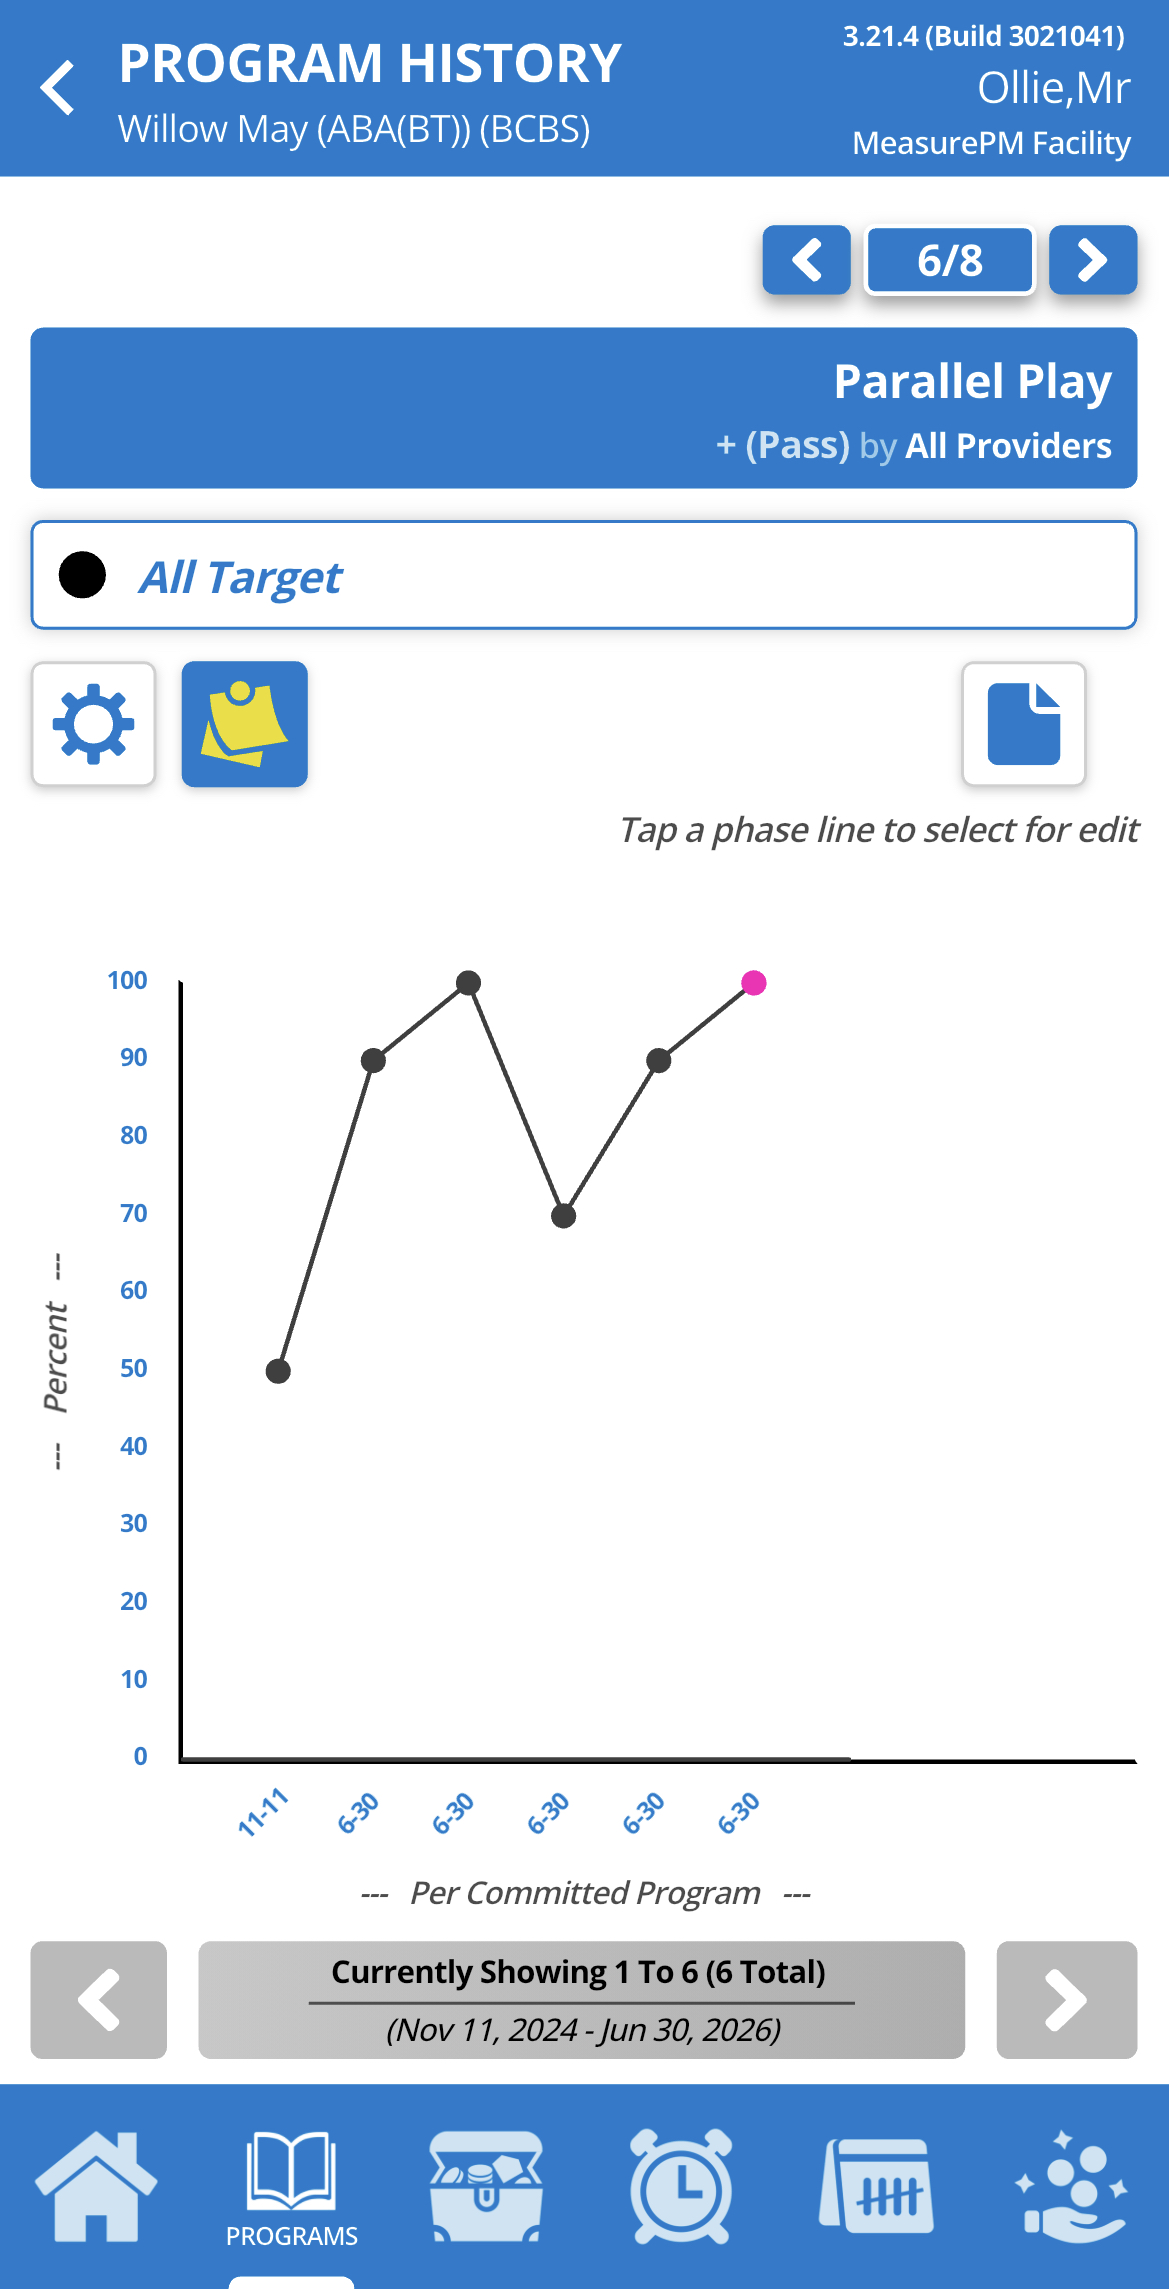 |
| Green | Success Criteria Detected | 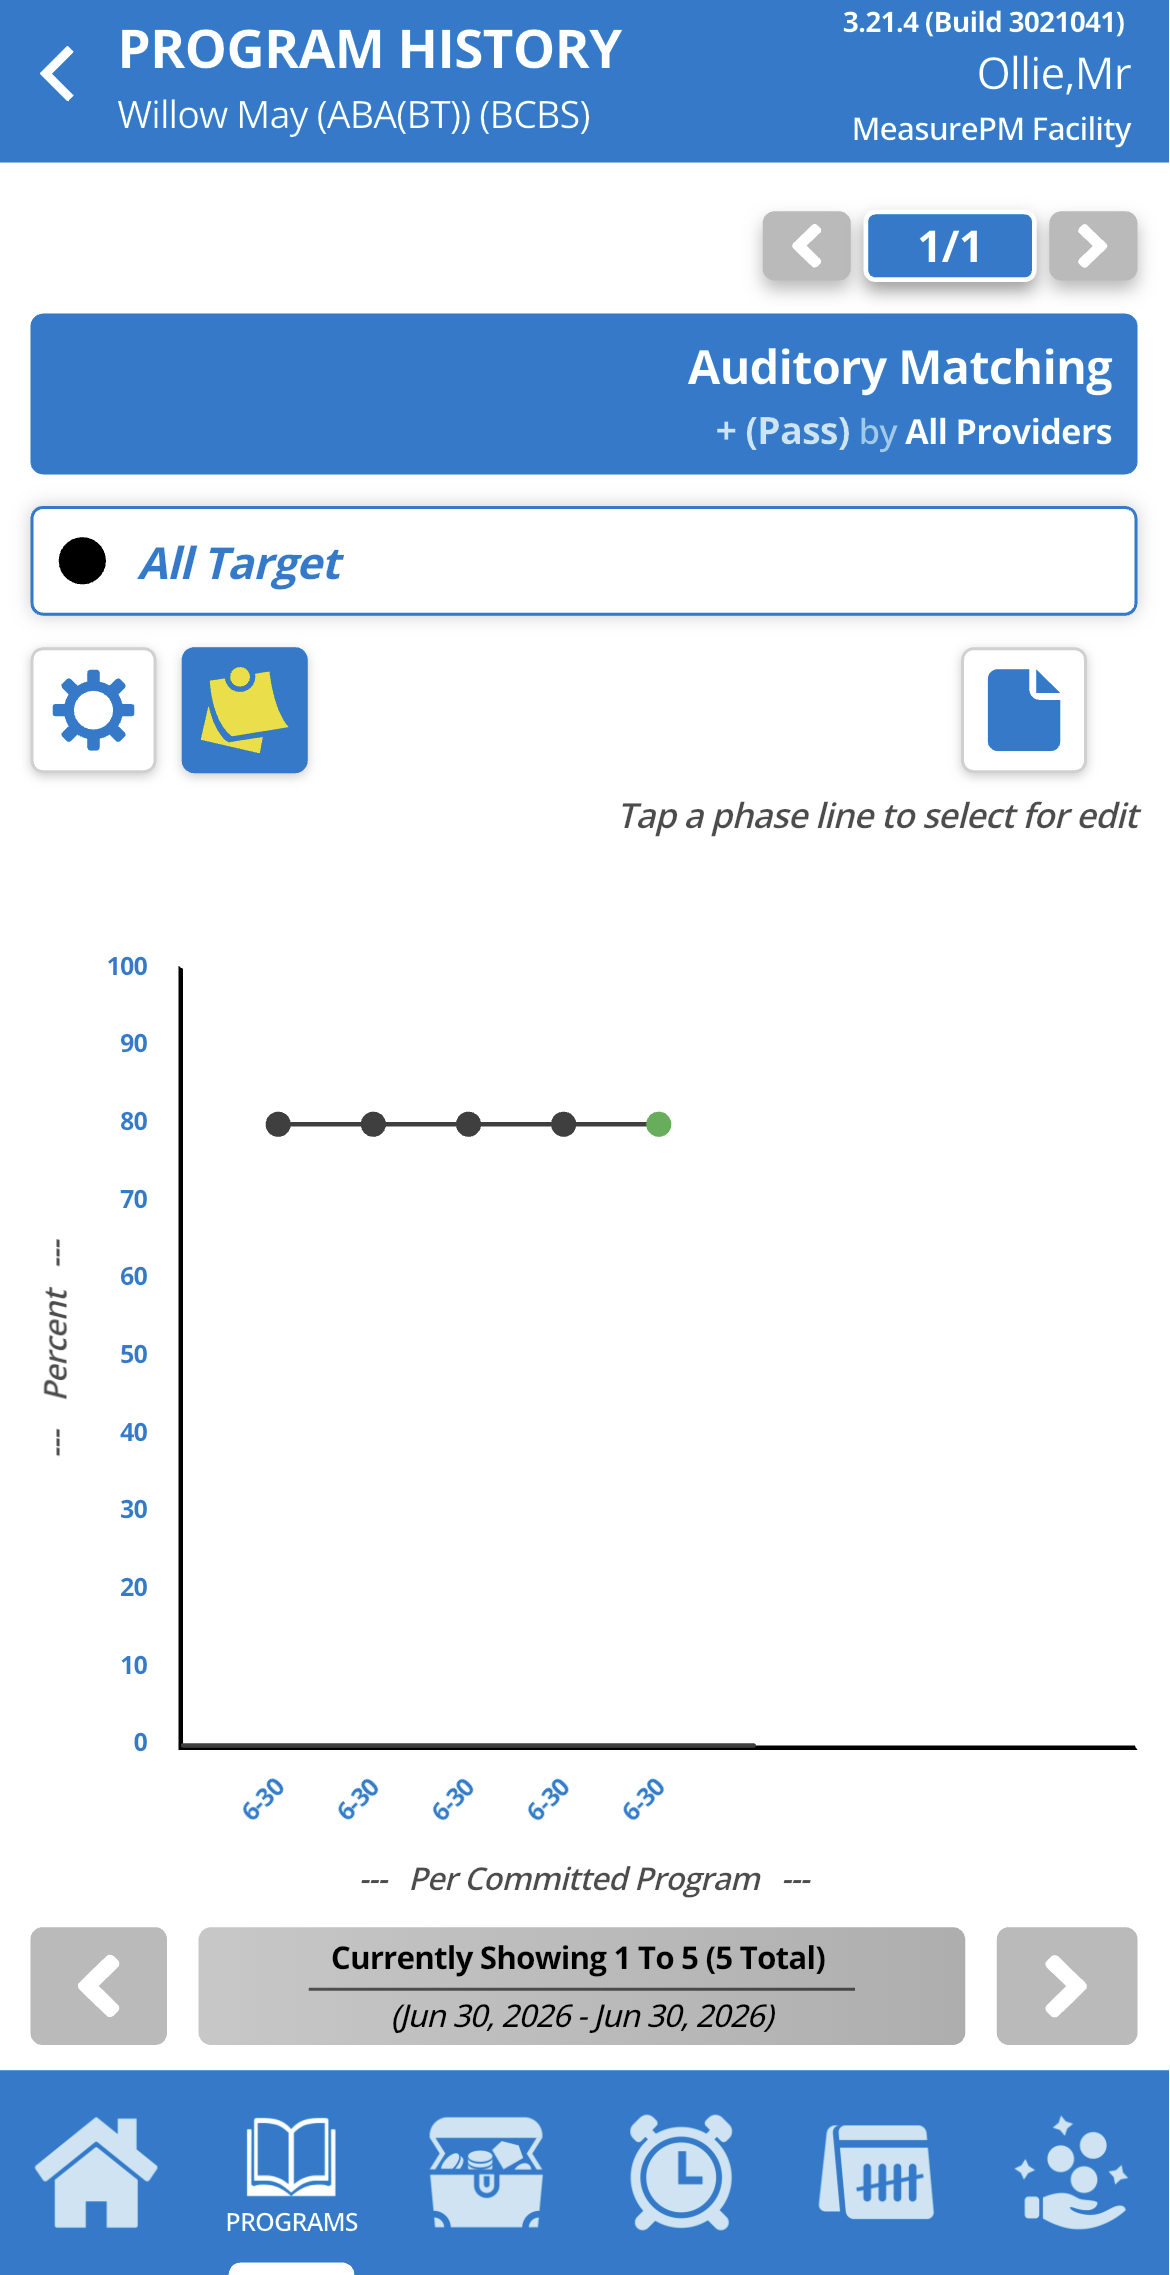 |
| Blue | Success Criteria and Trend Detected |  |
For more information on configuring success criteria, please refer to the following guide: Clinical Programming: Success Criteria
Other
Tracked trend settings can be changed at any point. When you want to customize these settings, log in on the web, set the trend tracking to your desired configurations, log out and refresh on the Mobile-App if there is an active appointment for that client.
Please reach out to support@measurepm.com for any inquiries!